
A roof can send a surprising amount of water onto one small area. Maybe runoff splashes across your back door, soaks an outdoor air-conditioning unit, or washes soil from a garden bed. A roof rainwater diverter can redirect that flow, but it only helps when water has a safe place to go. Rainwater diverter installation involves more than fitting a strip of metal beneath shingles: you also need to protect the roof, preserve its water-shedding layers, and plan the discharge route. This guide explains how diverters work, how to prepare, what to check after installation, and when gutters or drainage changes may be a better fit.
Key Takeaways
- Match the diverter to the runoff problem: Use a roof diverter for a specific area, such as a doorway or patio; consider gutters or downspouts when water comes from several roof sections.
- Choose a safe discharge route: Direct water away from the foundation, walkways, and erosion-prone landscaping, then test the flow gently before relying on the system.
- Protect the roof and check the system regularly: Follow product instructions, watch for debris or leaks, and ask a roofing or gutter professional for help with difficult access or ongoing drainage issues.
What Is a Roof Rainwater Diverter, and When Does It Help?
A roof rainwater diverter is a strip of formed metal or flashing that redirects runoff from a specific part of a roof. It can help when water pours onto a back door, patio, outdoor air-conditioning unit, or a small area of landscaping. Unlike gutters, which collect water along the roof edge and carry it to downspouts, a diverter handles runoff from a limited area. It’s most useful when you have a localized problem and a clear, safe place for the water to drain.
How a Roof Diverter Redirects Runoff
A roof diverter guides water away from the spot directly below it and toward a chosen discharge area. Depending on the design, it may sit beneath shingles and extend out from the roof to direct runoff to one side. For instance, a diverter above a doorway can shift water away from the entrance, while one near an outdoor unit can help keep roof runoff from splashing onto the equipment. This roof diverter guide shows how a diverter can protect a specific feature.
The discharge path matters as much as the diverter itself. Water should not end up on a slippery walkway, pool beside the house, or flow toward another area that needs protection. If you can’t direct runoff to a suitable spot, a broader gutter or drainage solution may be more effective.
Protect Foundations, Landscaping, and Outdoor Areas
A diverter can reduce concentrated runoff over an entrance, outdoor seating area, or a small section of garden. It may also help prevent water from repeatedly soaking equipment or washing soil from beneath the eaves. But moving water away from one spot is only useful if it doesn’t create a new problem elsewhere.
To help protect your foundation, direct runoff to an area where it can drain away from the home without causing pooling or erosion. A roof diverter is not a substitute for a complete drainage plan. If water regularly collects near your foundation, consider whether gutters, downspouts, or changes to the drainage route are needed. TX Gutter Solutions provides gutter and drainage services for Central Texas properties.
Compare Roof, Downspout, and Rain-Barrel Diverters
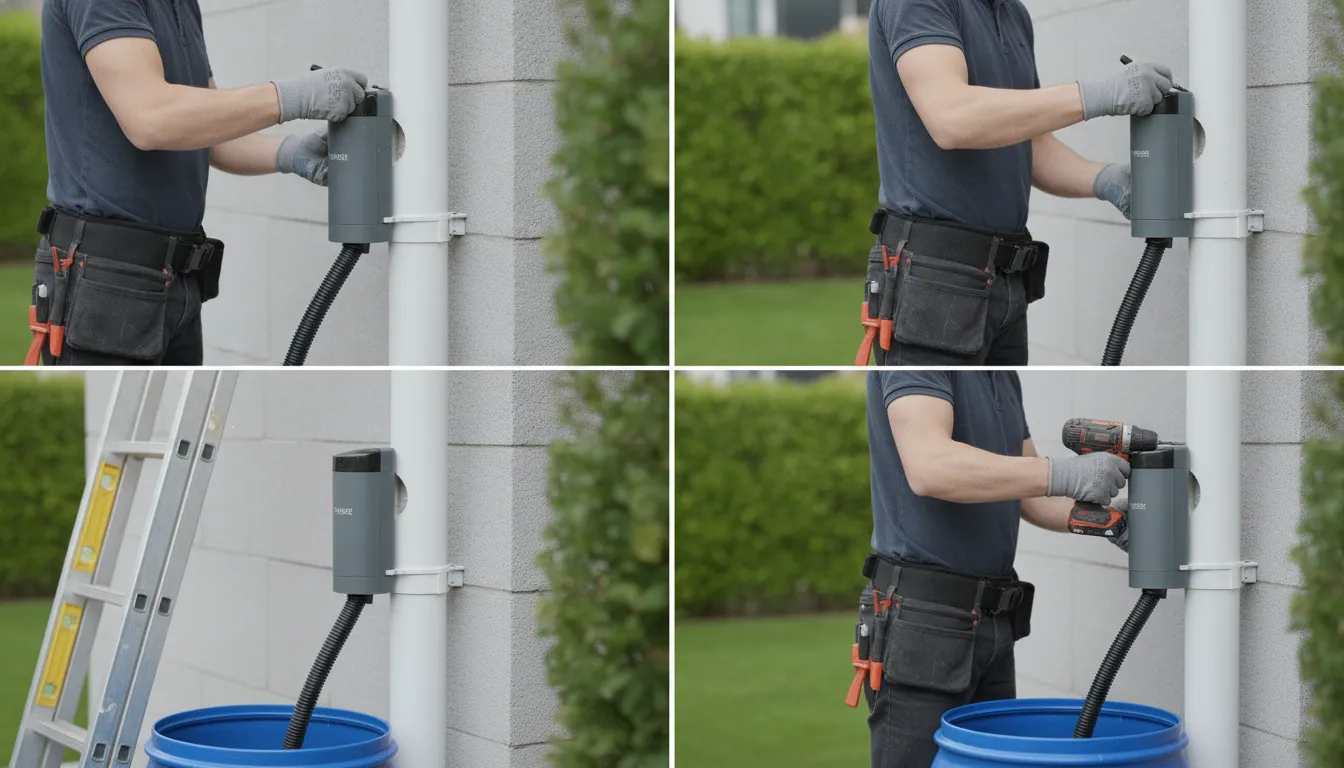
A roof diverter redirects runoff across or away from a small section of roof. A downspout diverter, by contrast, fits into a downspout and redirects some of the collected water, often toward a storage container. A rain-barrel diverter is designed to fill a barrel or tank while allowing excess water to continue through the drainage system. This rainwater collection example shows how a downspout diverter can direct water into a storage container.
Choose a roof diverter for a localized runoff issue, or a downspout or rain-barrel diverter if you want to collect rainwater. If water needs managing along several roof edges, a properly planned gutter system can provide more consistent control.
Plan the Diverter and Runoff Route
Before installing a roof rainwater diverter, decide where the water should go. A diverter can redirect runoff from one part of the roof, but it won’t fix a drainage issue if water still collects beside the home. Trace the route from the roof to its final destination, and consider how heavy rain could affect soil, landscaping, walkways, and your foundation.
Choose a Diverter for Your Roof and Intended Use
Start with the problem you want to solve. A roof-mounted diverter may help steer runoff away from a doorway, patio, or outdoor air-conditioning unit. If you want to collect rainwater, choose a product designed to connect with your rain barrel and gutter system. A downspout diverter works differently: it redirects water after it has entered the downspout.
Check that the product suits your roof material, slope, and expected water flow. A diverter made for a small section may not handle runoff from a broad roof area during a downpour. Review the product’s installation guidance before you buy, and confirm that the diverter can work with your existing gutters and downspouts.
Measure the Area and Follow Manufacturer Instructions
Measure the roof area where you want to intercept runoff, then check the diverter’s recommended length and placement. The right size depends on the roof, the source of the water, and the area you want to protect. Some guides recommend extending a diverter beyond the feature below it, such as a doorway, but use the product’s specifications instead of relying on a general measurement.
Read the instructions for your specific diverter before cutting or fastening it. Products can differ in how they fit beneath shingles, which fasteners they require, and where sealant should be applied. Incorrect placement can disrupt the roof’s water-shedding layers and lead to leaks. If your roof is steep, damaged, or difficult to reach, have a professional assess the installation.
Direct Water Away from the Foundation
Plan a clear route that carries water away from the house, walkways, and areas where flowing water could wash out soil. Direct runoff toward a suitable drainage area, such as a garden that can accept it, while making sure it won’t pool near the foundation or flow onto a neighbor’s property.
Consider what happens after water leaves the diverter. Soil that stays wet, displaced mulch, or a puddle near the house may mean the discharge point needs adjusting. If runoff comes from several roof areas or existing downspouts, a diverter alone may not be enough. TX Gutter Solutions provides gutter and drainage services to help manage water around homes and protect foundations and landscaping.
Plan for Overflow and Check Local Requirements
If the diverter feeds a rain barrel, plan for when the barrel fills. Choose a system that sends excess water back through the regular gutter system or to a designated overflow outlet. Direct overflow to a safe drainage area, and check the barrel and outlet regularly for clogs. The Texas Water Development Board’s rainwater harvesting guidance offers helpful information about collection systems.
Before installation, review the product instructions and check applicable city or county requirements, as well as any homeowners association rules. Requirements can vary by property, project type, and discharge location. If you’re unsure where the water should go, or it continues to collect near the house, a gutter professional can help determine whether the diverter, downspouts, or drainage plan needs to change.
What Tools and Materials Do You Need?
Before you begin, check the diverter manufacturer’s instructions and confirm the product is compatible with your roof. The required materials and installation method can vary, so gathering the right supplies first can help prevent damage and avoid extra trips up and down the ladder. Don’t start if the roof is wet, windy, or unsafe to access.
Choose a Diverter or Drip-Edge Flashing
Select a diverter designed for your roof and the amount of water you want to redirect. Many models are metal strips installed beneath a shingle course, but their shape, length, and placement vary. Check the product instructions to confirm how the diverter should fit your roof and where it should discharge water.
A diverter is not a replacement for damaged or missing flashing. Inspect the area before you install anything, and address existing roof problems first. If you’re unsure whether you need a diverter, drip-edge flashing, or a change to your gutter layout, have a professional assess the runoff route. The right solution depends on your roof, gutters, and the area you’re trying to protect.
Gather Approved Fasteners and Roof-Compatible Sealant
Use only the fasteners specified by the diverter manufacturer. The right type and length depend on the product and roof assembly. A fastener that is too long or installed in the wrong place could damage underlying materials, while an incompatible fastener may not hold securely.
Keep roof-compatible sealant on hand only if the instructions call for it. Some products require sealant on particular fastener heads or edges, but applying it elsewhere can interfere with drainage or trap water. Sealant also cannot make loose or poorly fitted flashing safe. If you notice an active leak, arrange for a roof inspection before installing a diverter.
Gather a Measuring Tape, Tin Snips, Pry Bar, and Hammer
Use a measuring tape to mark the diverter’s position and length before cutting or lifting shingles. Tin snips suited to the metal can help you trim it to size. Wear gloves and eye protection while cutting, since metal edges may be sharp. Use a hammer only if the manufacturer’s instructions call for it, and follow the specified fastening method.
A small, flat pry bar may help lift a shingle edge, but work gently to avoid creasing or tearing the shingle. Don’t force shingles that are brittle, stuck, or damaged. If they won’t lift without resistance, stop and seek professional help. Keep your tools secured while you work so they can’t slide off the roof.
Set Up a Ladder and Fall-Protection Equipment
Working on a roof carries a serious fall risk, especially on steep, high, or slick surfaces. Place a stable ladder on firm, level ground, position it correctly for access, and follow the ladder manufacturer’s instructions. Review OSHA ladder safety guidance before setting up.
Use appropriate fall-protection equipment when required, and don’t work alone. Keep people and pets clear of the area below, and avoid carrying tools in your hands while climbing. If you don’t have the right equipment or experience working at height, hire a professional. TX Gutter Solutions offers gutter and drainage services for homeowners who need help managing roof runoff.
Keep a Garden Hose for Testing
After installation, use a garden hose to check where the water flows. Apply a gentle stream to the roof above the diverter. Avoid high-pressure spray, which could force water beneath shingles. Start with a short test, and watch the full route from the diverter to the discharge area.
Check that runoff reaches the planned drainage area without collecting beside the foundation, washing out landscaping, or spilling onto a walkway. Look for signs of leaks around the installation and beneath it. If water backs up, pools, or escapes at the edges, stop the test and reassess the diverter’s position and discharge path before relying on it during rain.
Prepare the Roof and Work Area
Before installing a rainwater diverter, check the roof, choose a safe work window, and plan where the redirected water will go. Careful preparation can help prevent roof damage and drainage problems.
Inspect Shingles, Flashing, and Roof Condition
Check the work area for cracked, curled, or missing shingles, loose flashing, and signs of water damage. A diverter depends on the roof’s existing layers to shed water correctly. If shingles or flashing are already damaged, lifting or fastening material nearby could make a leak worse. Address roof problems before starting the installation.
Look at how the diverter will sit against the roof, too. It needs a consistent slope so water continues moving instead of collecting behind it. Review common roof diverter problems and follow the product instructions for placement. If you find damage or are unsure how the diverter will fit, ask a roofing professional to assess the area.
Check the Weather and Set Up the Ladder Safely
Choose a dry, calm day for the installation. Wet shingles can be slippery, while strong winds can make it difficult to handle a ladder or a long piece of metal. Check the forecast and postpone the work if rain or high winds are expected. In Central Texas, storms can develop quickly, so allow enough time to complete the work and secure your tools.
Set the ladder on firm, level ground and secure it according to the manufacturer’s instructions. Keep three points of contact while climbing, and use appropriate fall-protection equipment. Avoid working alone on a high or steep roof. If the roof is difficult to reach, hire a professional. After severe weather, check seams and joints for damage before continuing with roof work.
Mark the Position and Confirm the Discharge Path
Plan the diverter’s position and the water’s route before lifting shingles or making cuts. Use the product instructions to mark the location, taking into account the height of the rain barrel, drain, or other outlet. A diverter placed too high may send water over the inlet, while one placed too low may not direct runoff into the collection point effectively.
Trace the discharge path all the way to its endpoint. Water should drain away from the home rather than collect near the foundation, erode landscaping, or cross a walkway. If the route requires a longer downspout or another drainage change, review gutter and drainage options before installation. A clear plan helps you spot problems while adjustments are still easy to make.
How Do You Install a Roof Rainwater Diverter?
Installing a roof rainwater diverter means lifting shingles, fitting flashing, and securing it without disrupting the roof’s water-shedding layers. Follow the product instructions, since designs and fastening details vary. If your roof is steep, damaged, or hard to reach, hire a qualified professional instead of attempting the work yourself. Family Handyman’s rain diverter guide offers an example of the process.
Measure and Cut the Diverter
Measure the area you want to protect, such as a doorway or patio, then check the diverter manufacturer’s instructions for the right length. Some guides recommend extending the diverter 2 to 3 feet beyond the opening so runoff is directed past both sides. Use tin snips to cut metal flashing, and wear gloves to protect your hands from sharp edges.
Before cutting, identify where the water will go once it leaves the diverter. It should reach a suitable drainage area, not collect beside the foundation or spill onto a busy walkway. If the diverter will connect to a gutter or downspout, include that connection in your measurements. A careful fit helps prevent gaps and directs runoff where you intend it to go.
Lift Shingles Without Tearing or Creasing Them
The diverter’s flange typically slips beneath the shingles, so lift the shingle tabs gently with a flat pry bar. If the tabs are sealed together, work slowly to loosen the seal. Avoid tearing or sharply creasing the shingles, as damage can create an entry point for water.
Lift only the area needed to fit the diverter, and preserve the existing overlap between shingles and flashing. Don’t force shingles that are brittle, cracked, or firmly bonded. If you discover damaged roofing or flashing, pause the installation and have it assessed first. Keeping the roof’s protective layers intact is essential, and a roofing professional can advise whether a diverter is suitable for your roof.
Position the Diverter and Set a Consistent Slope
Slide the diverter beneath the loosened shingles, following the manufacturer’s guidance for how far the flange should extend under the roofing. Set a slight, even slope toward the planned discharge point. Avoid dips or sharp bends, which can slow the flow and allow water to pool.
Before fastening the diverter, check its full length to confirm water can travel smoothly from the higher end to the lower one. Direct the outlet away from the foundation, siding, and areas where runoff could cause erosion. If the diverter feeds into a gutter or drainage system, make sure that system can handle the added water. For more involved runoff concerns, review TX Gutter Solutions’ gutter and drainage services to see what options may suit your property.
Secure the Diverter with the Correct Fasteners
Use the fasteners and placement specified by the diverter manufacturer. Some products call for roofing nails driven through the flange and into the roof deck, but requirements vary by product and roof assembly. Choose roof-compatible, corrosion-resistant fasteners, and avoid creating holes in exposed areas where water flows.
Apply roofing cement or sealant only where the manufacturer recommends, such as over fastener heads or beneath lifted shingle tabs. Keep drainage channels and open edges clear so water can flow freely. Press the shingle tabs back into place as directed, then check that the shingles and diverter overlap in a way that sheds water down the roof. If the fastening or sealing instructions are unclear, ask a roofing professional before proceeding.
Seal the Diverter Without Causing Leaks
A rain diverter should redirect runoff without disturbing the roof’s existing water-shedding layers. Sealant can protect specified fasteners and joints, but it won’t correct damaged shingles, poor placement, or a blocked drainage path. Follow the diverter manufacturer’s instructions and use products compatible with your roofing material. If the roof is steep, damaged, or hard to reach, contact a roofing or gutter professional instead of attempting the installation yourself.
Preserve Shingle and Flashing Overlaps
Shingles and flashing overlap to guide water down the roof and away from the home. Position the diverter beneath the appropriate shingle course as the product instructions direct, lifting shingles only as much as needed. Avoid tearing, creasing, or forcing them, since damaged shingles can leave openings for water.
Keep existing flashing in place, and don’t install the diverter in a way that sends runoff beneath the roofing or blocks its normal path. If shingles are loose, brittle, or damaged near the installation area, pause and address the roof condition first. The Family Handyman installation guide offers a helpful overview of fitting a diverter beneath shingles while preserving their overlap.
Seal Fastener Heads and Manufacturer-Specified Edges
Choose the fasteners recommended for your diverter and roofing material, and place them where the manufacturer specifies. Drive each one straight and snug, taking care not to damage the surrounding shingles. Apply compatible roofing cement or sealant to exposed fastener heads and to any edges the instructions identify for sealing. Use only enough to cover those areas.
Don’t coat every seam or cover a joint that the manufacturer says should remain open. Excess sealant can interfere with runoff and make later repairs more difficult. Check the product label for material compatibility and application directions. If you notice loose shingles or damaged flashing near the work area, have those issues repaired before testing the diverter.
Apply Compatible Sealant Without Blocking Drainage
Apply sealant in a controlled bead, following the product directions for surface preparation, temperature, and curing time. Keep it out of the channel where water needs to flow, and avoid creating a ridge that could catch leaves or hold water against the roof. The diverter should guide runoff toward a suitable discharge area without allowing it to collect near the home.
Once the sealant has cured as directed, test the diverter with a gentle flow of water and check the roof and discharge area. If water pools or runs toward the foundation, adjust the route rather than adding more sealant. For persistent leaks or runoff concerns, a professional gutter and drainage assessment can help identify whether the diverter, gutters, or downspouts need attention.
Test the Installation and Check Runoff
After the sealant has cured for the time stated on its label, test the diverter before relying on it in a storm. A gentle water test can show whether the diverter channels runoff properly and whether the discharge route carries water away from the home. Stay on the ground while observing the flow, and never climb onto a wet roof. If the roof is steep, high, or difficult to reach, have a roofing or gutter professional check the installation.
Run Water Gently over the Roof Above the Diverter
Use a garden hose to apply a gentle, steady flow to the roof above the diverter. Start with low pressure and give the water time to travel across the roof and along the diverter. This installation demonstration shows how a hose can simulate rainfall and help confirm that water follows the intended path.
Watch from a safe spot on the ground, or ask someone to observe while you operate the hose. Avoid high-pressure spray, and don’t direct water beneath the shingles. That can force water into places normal rainfall would not reach. If the flow stalls, spills over, or takes an unexpected route, stop the test and check the diverter’s position before trying again.
Confirm Runoff Reaches the Planned Drainage Area
Follow the water all the way from the diverter to its discharge point. It should reach the planned drainage area without spilling across a doorway or walkway, or collecting beside the foundation. A roof diverter installation video demonstrates how directing runoff toward a suitable area can help prevent water from pooling near the home.
Check the entire route, not only the outlet. Water may leave the diverter smoothly but still spread across soil or pavement near the house. If the discharge point needs to be farther away, a downspout extension or another drainage adjustment may help. For a larger runoff concern, review TX Gutter Solutions’ gutter and drainage services to see what options may suit your property.
Check for Leaks, Pooling, Overflow, and Erosion
As water flows, look for drips beneath the diverter, water backing up along its edge, or runoff spilling over the sides. Then check the ground for puddles near the foundation, soil channels, or mulch washing away. These signs can point to an inadequate slope, a blocked outlet, or a discharge route that needs attention.
If the diverter connects to a downspout or collection system, check that section for debris, too. Even a partial clog can slow the flow and contribute to overflow. This guide to clearing and preventing diverter clogs explains what to look for. Clear accessible debris and repeat the test. If leaks continue or water backs up beneath the roofing, stop and ask a professional to assess the installation.
Adjust the Slope or Discharge Route if Water Collects Near the Home
If water pools on the roof, spills over the diverter, or collects beside the house, stop the test and locate where the flow first goes wrong. A diverter that sits too flat may not guide water toward its outlet. The discharge route may also end too close to the foundation. This guide to roof rain diverter problems explains why adequate pitch helps runoff move as intended.
Only make adjustments if you can work safely and avoid damaging shingles or flashing. Set a consistent slope toward the outlet, then repeat the test with a gentle flow. If water still gathers near the foundation, the discharge route may need an extension or a broader drainage solution. A roofing or gutter professional can assess whether the diverter, gutters, or downspouts need changes.
Avoid Common Rainwater Diverter Installation Mistakes
A rainwater diverter can send roof runoff where you want it, but only if it fits the roof and works with the home’s existing drainage. Take time to check the product, plan the water’s route, and test the finished installation. These steps can help prevent leaks, pooling, and damage to nearby landscaping.
Choose a Compatible, Correctly Sized Diverter and the Right Fasteners
Choose a diverter designed for your roof type and the amount of runoff you plan to redirect. Check the manufacturer’s instructions and measure the intended installation area before buying. A diverter that is too short or narrow may let water spill around its edges, while an incompatible design can interfere with shingles or flashing.
Use only the fasteners recommended for the product and suitable for your roofing material. A fastener in the wrong location or of the wrong type can damage shingles or create an opening for water. Don’t rely on whatever nails or screws happen to be on hand. If the roof is older, damaged, or made from a material you’re unfamiliar with, ask a roofing professional to confirm the diverter and fasteners are appropriate.
Give the Diverter Enough Slope
A diverter installed flat may hold water instead of directing it toward the outlet. Set a consistent slope toward the discharge point, following the manufacturer’s instructions. The correct angle depends on the product and roof, so don’t guess or copy a measurement from another home. Roofing guidance on diverter problems explains how incorrect positioning can keep water from flowing as intended.
Before securing the diverter, check its alignment from end to end. Dips can collect water and debris, while a poorly aimed outlet may send runoff onto siding or a walkway. After installation, run water gently over the roof above the diverter and watch its path. If water pools or spills over the edge, adjust the slope or discharge route before considering the job complete.
Protect Shingles and Preserve Roof-Water Flow
Take care when working around shingles and flashing. Forcing shingles upward or bending them sharply can damage the roof’s water-shedding layers. Follow the diverter’s installation instructions for lifting and positioning shingles, and stop if they crack, tear, or resist movement. Keep existing drainage paths clear, and don’t change flashing in a way that could trap water.
The diverter should guide runoff without interrupting the roof’s natural flow. Aqua Barrel’s advice on diverter clogging highlights the value of planning for reliable drainage over time. Check that the channel is clear and water can move freely after installation. If shingles or flashing need repair, have a qualified roofer assess the roof before adding a diverter.
Keep Water Away from Foundations, Walkways, and Other Problem Areas
Decide where the water will go before you install the diverter. Direct runoff toward a suitable drainage area, not beside the foundation, across a frequently used walkway, or into a garden bed that may erode. Test the route with a garden hose and check it again after heavy rain, when roof runoff can quickly expose drainage problems.
A diverter alone may not carry water far enough from the house. Depending on the property, a longer downspout extension, drainage channel, or change to the gutter system may be needed. TX Gutter Solutions’ drainage services can help property owners assess options for directing water away from the home. If water continues to collect near the slab or damage landscaping, have the drainage plan reviewed rather than sending runoff toward another problem area.
Maintain the Diverter for Reliable Runoff
A rainwater diverter needs occasional attention to keep runoff moving where you want it. Leaves and roof grit can block the water path, while loose fasteners or damaged sealant can leave the surrounding roof vulnerable to leaks. A quick visual check during regular home maintenance can help you spot these issues before they affect the roof, gutters, or areas around your foundation.
Check the diverter and the runoff route from the ground whenever possible. Look for water spilling over the gutter, marks on siding, or soil that stays wet after rain. If you need to inspect the roof itself, use proper fall protection and avoid stepping onto a wet or steep surface. The safest choice for a high, steep, or hard-to-reach roof is to call a professional.
After cleaning or repairs, test the system with a gentle flow of water. Confirm that it passes through the diverter and drains away from the home without pooling or washing out landscaping. These checks are especially useful after storms and during spring and fall maintenance. If water continues to collect near the house, the issue may involve more than the diverter. A gutter and drainage professional can assess the full runoff path and recommend a suitable fix.
Clear Leaves and Debris from the Diverter, Roof, and Gutters
Leaves, pine needles, seed pods, and roof grit can slow water before it reaches the diverter. Clear visible debris from the diverter opening and nearby gutters during seasonal maintenance, especially in spring and fall. Check that the downspout is firmly connected to the gutter, the home, and the rain barrel or discharge pipe. The District of Columbia homeowner maintenance guide recommends seasonal gutter cleaning and checking downspout connections.
Use a stable ladder only when you can work safely, and never reach beyond its sides. Avoid climbing onto a steep, wet, or damaged roof. For hard-to-reach areas, have a qualified professional clear the debris and check that water can pass through the system.
Check for Clogs, Wear, Loose Fasteners, and Seal Damage
A diverter can be partly blocked even if some water still flows. Look for debris or sediment around its opening, then check visible fasteners for looseness. Inspect accessible sealant for cracks, gaps, or peeling, and look for rust, bending, or other damage. A guide to downspout diverter clogs notes that partial blockages can cause problems, too.
Do not pull up shingles or disturb flashing during a routine check. If you notice a leak, damaged roofing, or a recurring clog, avoid applying sealant as a quick fix. A roofing or gutter professional can identify the cause and make repairs without compromising the roof’s water-shedding layers.
Inspect After Severe Weather and During Seasonal Checks
Heavy rain and strong winds can shift debris, loosen fasteners, or expose gaps in a seal. After severe weather, look for visible damage, blocked screens, or sediment in filters from a safe position. Add a more thorough visual check to your spring and fall home-maintenance routine. A rainwater system maintenance schedule also recommends checking diverter function and clearing debris after storms.
Keep a brief record of clogs, leaks, and repairs. Notes can help you notice whether the same problem returns after cleaning or a storm. If it does, the diverter may need adjustment or replacement, or the issue may stem from the surrounding roof and gutter system. Have a professional inspect the area if you cannot identify the cause safely.
Recheck Water Flow and Watch for Pooling or Erosion
After cleaning or completing a repair, run water gently over the roof above the diverter and watch where it goes. Water should move through the diverter and follow the planned discharge route, not collect beside the house. Check the ground for puddles, muddy patches, or channels forming in soil and mulch. These signs can point to a blockage, poor slope, or a discharge point that needs to be moved.
Confirm that runoff drains away from the foundation without spilling onto walkways or neighboring property. If water keeps pooling near the home or washing out landscaping, the problem may call for a change to the downspout or drainage setup. A professional can review the whole route and help protect both the home and yard.
Know When to Call a Roofing or Gutter Professional
A rainwater diverter changes how water flows across your roof and away from your home. If the roof is difficult to access, water keeps leaking or pooling, or the discharge route sends runoff toward your foundation, a professional can help identify the cause and recommend a lasting fix. They can also tell you whether a diverter is suitable or if the roof, gutters, downspouts, or drainage system need attention.
Get Help with Steep, High, Damaged, or Hard-to-Reach Roofs
Leave installation to a professional if your roof is steep, high, damaged, or difficult to reach safely. Working from a ladder or on a roof can lead to serious falls, and lifting shingles may cause more damage if they’re brittle or already compromised. A roofing professional can inspect the area and install the diverter while preserving the roof’s shingle and flashing overlaps.
Proper placement and slope matter, too. A diverter installed flat or with too little pitch may hold water rather than direct it off the roof, which can contribute to water damage. Lintar Roofing explains why diverter pitch is important. If the roof needs repair, address that before adding a diverter.
Address Persistent Leaks or Runoff Problems
If water continues to leak or collect after installation, don’t rely on extra sealant as a quick fix. The diverter may be poorly positioned, flashing may need repair, or debris may be blocking the flow. A downspout diverter can clog as well, and a partial blockage may still interfere with drainage. Aqua Barrel explains how a clogged diverter can disrupt water flow.
Look for water stains, damp spots, pooling, or runoff spilling over the diverter. If the issue continues, arrange an inspection to find its source. A gutter professional can assess the connected parts of your water-management system and recommend a repair based on the underlying problem.
Get Help with Drainage Issues That May Require Gutter or Downspout Changes
A diverter needs a safe place to send water. If runoff lands beside the foundation, crosses a walkway, washes away soil, or pools near the house, the discharge route may need to change. Depending on the property, a solution could involve adjusting the gutters, extending or relocating a downspout, or adding drainage features.
Releasing water close to a slab can contribute to foundation settling, mold growth, and standing water, as Centex Seamless Gutters explains. A professional can assess the yard’s slope and plan a route that carries water away from the home. TX Gutter Solutions provides gutter and drainage services in Central Texas and the Dallas–Fort Worth area.
Frequently Asked Questions
Can a roof rainwater diverter replace gutters?
No. A roof diverter redirects runoff from a limited section, while gutters collect water along the roof edge and carry it through downspouts. If water spills from several roof areas or causes pooling near your home, a gutter or drainage solution may be a better fit.
How do I know where a roof diverter should send water?
Trace the route from the roof to its final destination. Choose an area where water can drain away from your foundation without crossing a walkway, washing out soil, or collecting near the house. Test the path with a gentle flow of water before relying on it during rain.
What is the difference between a roof diverter and a downspout diverter?
A roof diverter redirects water across a small section of the roof. A downspout diverter redirects water after it has entered a downspout, often to fill a rain barrel. Choose based on where you need to change the water’s path.
Can I install a roof rainwater diverter myself?
It depends on your roof, the product, and your experience working at height. Follow the manufacturer’s instructions, and do not attempt the work on a steep, damaged, wet, or hard-to-reach roof. A qualified professional can help prevent roof damage and install the diverter safely.
How often should I check a roof diverter?
Include it in seasonal maintenance, and check it after severe weather. Look for leaves, clogs, loose fasteners, damaged sealant, and signs of pooling or soil erosion. If water keeps leaking or collecting near your home, have a roofing or gutter professional inspect the full runoff route.