
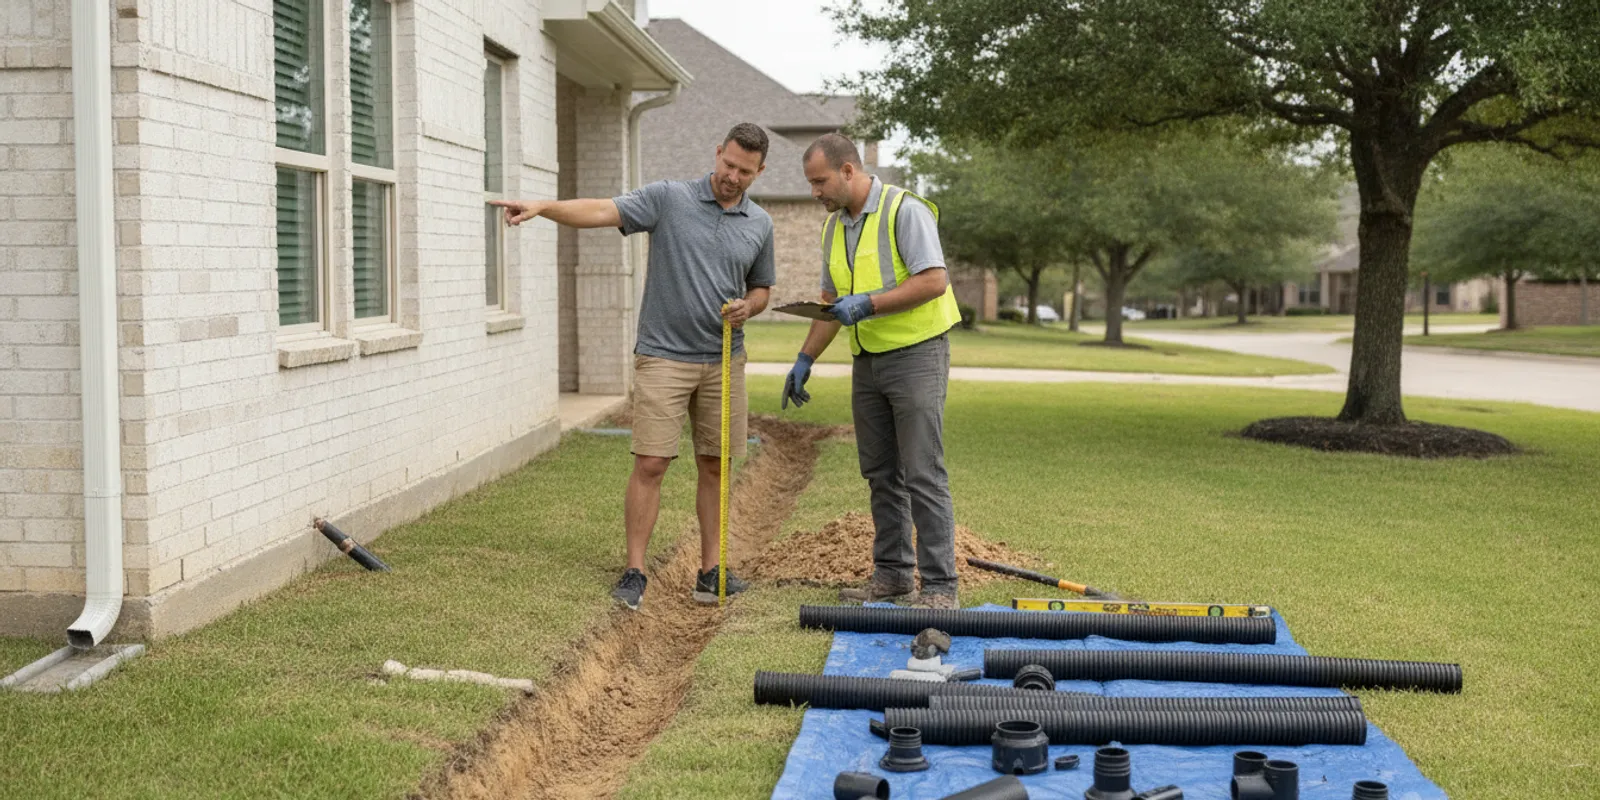
Learning how to install underground downspout drainage can help you move roof runoff away from a foundation, walkway, patio, or frequently wet section of yard. The basic idea is simple: connect the downspout to a buried pipe, carry water along a planned route, and release it at a safe outlet. The details matter, though. A poorly sloped pipe, weak connection, blocked outlet, or route that sends water toward another part of the home can replace one drainage problem with another.
Request a free drainage consultation
What does underground downspout drainage do?
An underground downspout drain is a below-grade path for water collected by a gutter system. The downspout directs water into an underground pipe instead of releasing it immediately at the side of the house. The pipe then carries the water to an outlet, such as a suitable area of lawn, a drainage swale, a pop-up emitter, or another approved discharge point.
This approach is useful when a downspout extension would cross a walkway, interfere with mowing, create an erosion channel, or leave water too close to the house. It can also make the area around a home easier to use. Underground drainage is not automatically the right answer for every downspout. The route still needs a dependable outlet, enough fall for the site, and a connection that can be inspected or serviced.
Before digging, it helps to understand the full water path. Gutters collect roof runoff. Downspouts carry that water to the ground. The underground line carries it farther. The outlet disperses or releases it. Each part must work with the next. If the gutter is blocked, the downspout is undersized, or the outlet is buried in soil, a new pipe may not solve the underlying issue.
When is an underground downspout line a good fit?
Look at what happens during and after rainfall rather than choosing a buried line only because it looks cleaner. An underground route may be a good fit when one or more of these conditions apply:
- Water exits beside the foundation and remains there instead of moving away.
- A surface extension would create a trip hazard or block a commonly used path.
- Runoff is carving a channel in soil, washing mulch away, or exposing plant roots.
- A downspout discharges onto a patio, driveway, stair landing, or low spot.
- Several downspouts need planned discharge points around the property.
- The yard has a natural slope that can carry water away without sending it toward another structure.
A buried line is a poor fit when there is no safe place for the water to go. It is also risky when the proposed route crosses an area with uncertain utilities, runs toward a neighboring property, depends on a steep drop that could erode soil, or would need to pass through a foundation wall without a properly designed detail. In those situations, pause and plan the entire drainage system first.
For related planning, see the gutter inspection checklist. It can help you look at the gutter, downspout, outlet, and surrounding grade as one connected system.
What should you inspect before digging?
Start with an inspection during dry conditions, then observe the same area during rainfall if possible. You want to understand where water begins, where it travels, and where it stops. Walk the roof edge and note each downspout. Look for overflow, loose joints, separated elbows, dents, and visible debris. Check whether the downspout is securely attached and whether water is already escaping at a seam before it reaches the proposed underground connection.
Then inspect the ground. Identify foundation walls, crawlspace or basement access points, patios, driveways, retaining walls, fences, gates, air-conditioning equipment, utility boxes, landscape beds, pools, detached structures, and property boundaries. Mark low areas where water collects. Also note places where a trench could interrupt irrigation, tree roots, hardscape, or established planting.
Check the fall of the proposed route. Water moving through a gravity-fed pipe needs a continuous downward path or a drainage design that accounts for changes in elevation. A route that rises in the middle can trap water and sediment. A route that is almost flat may work poorly if soil settles or a joint shifts. A route with too much slope may discharge water with enough force to erode the outlet area.
Finally, identify the outlet before you plan the pipe. Do not treat the end of the trench as an afterthought. The outlet should release water where it will not return toward the house, undermine a walkway, create a nuisance, or cross onto another property. Local requirements and site conditions may affect what outlet is appropriate. If you cannot explain where the water will go after it leaves the pipe, the plan is not ready.
How do you choose a route and outlet?
Use the shortest practical route that creates a reliable water path. Short does not mean straight at all costs. A small change in direction may avoid a utility, tree, slab, or planting bed and make the installation easier to maintain. Avoid unnecessary bends because each bend can slow flow and add another connection that may shift or collect debris.
Keep the route away from the foundation when the site allows. The purpose is to move water away, not simply to hide the downspout for a few feet. The line should not discharge beside the house, at the base of a retaining wall, or into a low area that drains back toward the structure. If the lot slopes toward the home, a simple gravity line may not be enough. The elevation and outlet need a more careful review.
Common outlet approaches include:
- Open daylight outlet: The pipe ends at a visible point where water can flow onto a stable, approved area.
- Pop-up emitter: A surface emitter remains closed when there is no flow and opens when water reaches it. It still needs a clear surrounding area and routine inspection.
- Drainage swale: Water is directed into a shallow, graded channel designed to move it across the property.
- Dispersal area: The outlet releases water across a stable surface with measures to limit erosion.
Do not assume that connecting several downspouts to one line is always an improvement. More roof area can mean more water entering the pipe at once. The pipe, fittings, outlet, and receiving area all need to suit the combined flow. A professional assessment is especially useful when multiple roof sections converge, the property has limited fall, or runoff already causes standing water.
What tools and materials are typically needed?
The exact materials depend on the route, soil, pipe size, outlet, and existing gutter configuration. A typical small project may require a tape measure, stakes, marking paint, a level or laser level, a shovel, trenching tools, a utility-locating service, compatible underground drainage pipe, fittings, an adapter, couplings, a grate or emitter, and material for stabilizing the outlet. Some installations also need filter fabric, washed aggregate, or a transition fitting between the downspout and the buried line.
Choose components intended for drainage and make sure each connection matches. Thin flexible tubing can be easy to route, but it may kink, deform, or collect sediment if it is not supported. Rigid pipe can hold a straighter grade and may be easier to clean, but bends and joints must be planned. The connection at the downspout deserves special attention because it is exposed to movement, debris, and concentrated flow.
Do not select pipe by appearance alone. The line needs adequate capacity for the downspout and the area it serves. The outlet needs to remain visible or accessible enough for inspection. If the system includes a grate, emitter, or cleanout, keep that component from being buried by soil or mulch. A concealed drainage system should not become an inaccessible drainage system.
Before using a shovel, contact the appropriate utility-locating service and follow applicable local safety requirements. A private line, irrigation system, or other feature may not be marked by a standard public utility locate. If the route crosses a utility corridor, slab, retaining wall, or other uncertain area, get qualified guidance before excavation.
How do you install underground downspout drainage step by step?
1. Confirm the water source
Clean the gutter and inspect the downspout before tying it into a buried line. Remove leaves and sediment from the gutter channel, verify that water reaches the downspout, and check for leaks at elbows and seams. A clogged gutter can overflow before the underground system ever receives water. Repair or stabilize the visible gutter and downspout components first.
Run water through the downspout with a hose if conditions allow. Watch for leaks, slow movement, and water escaping at the proposed connection point. This simple check gives you a baseline. It also prevents you from burying a defect that will be difficult to reach later.
2. Mark the route and the outlet
Mark the planned route on the ground with stakes or visible marking paint. Mark both sides of hardscape, the location of every bend, and the final outlet. Walk the route from different angles. Confirm that it does not create a new low spot, direct water at a foundation, or interfere with a gate, sidewalk, driveway, or service access.
Measure the route and estimate the elevation change from the connection to the outlet. Do not rely only on what looks downhill. A long yard can appear to slope while containing a shallow rise that interrupts gravity flow. Check the grade at several points and revise the route if necessary.
3. Locate utilities and other buried features
Arrange utility locating before excavation, then identify private features that may not be included. Irrigation, low-voltage lighting, invisible pet fencing, septic components, drainage lines, and older repairs may require separate investigation. Keep records or photographs of the route before covering it so future maintenance has useful reference information.
If you cannot verify what is below the proposed trench, do not guess. Change the route or obtain a qualified assessment. A clean surface finish is not worth damaging a utility or creating a safety problem.
4. Excavate a consistent trench
Excavate along the marked route to the depth required by the pipe and site conditions. Keep the trench bottom as smooth and consistent as possible. Remove sharp rocks, roots, and debris that could damage the pipe or create a high spot. Protect open trench areas from people and pets while work is underway.
Do not make the trench deep merely to make the pipe disappear. Excessive depth can make connections and future repairs harder. The pipe needs enough cover for its location and intended use, but the correct depth depends on the material, local conditions, and whether the route passes beneath a surface that carries foot or vehicle traffic.
5. Prepare the pipe bed
A stable, even base helps the pipe maintain its intended fall. If the excavated soil contains large rocks or hard clumps, remove them and use suitable bedding material where needed. Set the pipe on the prepared base rather than leaving it suspended over voids. A pipe that is supported at only a few points can settle into a low spot later.
Check the grade as you prepare the bed. The line should move consistently toward the outlet. A short dip can retain water, sediment, and organic debris. A rise can stop gravity flow entirely. Recheck the route after placing the pipe because the finished grade may differ from the original trench measurement.
6. Connect the downspout to the underground pipe
Use a compatible adapter or fitting to transition from the above-ground downspout to the buried drainage line. Keep this connection aligned and supported. An angled or unsupported joint can separate when the soil settles or when the downspout is bumped during yard work.
Make the connection accessible until you have tested the system. Do not immediately cover it with soil. Pour water into the gutter or downspout and watch the fitting for leaks. If water escapes at the transition, correct it before continuing. A small leak at the top of a trench can saturate nearby soil and hide the real problem from view.
7. Assemble and test each pipe section
Lay out the pipe and fittings before final assembly. Keep bends gradual where possible. Make sure joints are fully seated and oriented in the direction of flow. If the system uses a cleanout, place it where it can be opened without digging. If it uses an emitter or grate, confirm that the outlet is level and stable.
Test the line in stages. Start with water at the downspout connection. Then inspect each accessible joint, bend, and outlet. Look for slow discharge, standing water, seepage along the trench, or a connection that moves. A good test is not just whether water eventually appears at the end. It is whether the water follows the planned path without escaping or backing up.
8. Secure the outlet
The outlet needs a stable transition from pipe to ground. If water emerges onto soil, protect the receiving area from erosion with an appropriate surface treatment for the site. If the outlet uses an emitter, keep its opening clear and slightly above the surrounding grade as required by the design. If the outlet enters a swale, make sure the swale itself carries water away rather than stopping at a shallow basin.
Observe the outlet during a larger test if possible. A small hose flow may not reveal how the receiving area behaves when the roof system is carrying more water. Watch for splashback, soil movement, pooling, and flow toward structures or neighboring areas. Adjust the outlet before backfilling if the discharge is not controlled.
9. Backfill in layers
After the system passes testing, place backfill carefully around the pipe. Remove large rocks and sharp debris that could damage it. Fill in layers and compact each layer appropriately so the trench does not become a long settling depression. Avoid striking or shifting the pipe while adding soil.
Do not bury the connection, cleanout, or outlet below the finished grade. Mark the route with a discreet reference if future digging or landscape work is likely. Take photographs before the final surface is restored. They can help locate the line if a blockage or settlement issue appears later.
10. Restore and monitor the area
Replace soil, sod, mulch, or other surface material while keeping the finished grade directed away from the home. Water the restored area as appropriate for the landscape, but do not use heavy equipment over a newly installed line unless the installation was designed for that load. Inspect the outlet after the first several rainfall events and again after yard work or landscaping changes.
How much slope does underground downspout drainage need?
There is no single slope that fits every property, pipe, outlet, or local requirement. The important principle is continuous movement toward the discharge point without a low section that holds water. The required grade depends on the pipe type, diameter, route length, surface conditions, and expected flow.
Use a level, laser level, or other reliable method to compare elevations along the route. A string line can help show the intended fall, but it should be set carefully and checked against fixed points. Do not estimate grade by eye, particularly on long routes or yards with broad, subtle changes in elevation.
A very shallow route can lose its fall when the trench settles. A sharply descending route can create an aggressive outlet flow or expose the pipe if soil erodes. The best route balances dependable movement, stable support, reasonable access, and a safe discharge. When the property does not provide enough fall, a different drainage approach may be required rather than forcing a gravity line into an unsuitable route.
What should you do when the yard is flat?
A flat yard does not automatically rule out underground drainage, but it makes the route and outlet more important. Begin by measuring the actual elevations instead of assuming the yard is level. Sometimes a shallow swale or a carefully located outlet provides enough fall. In other cases, the pipe may need a different discharge point or a designed drainage feature.
Do not bury a pipe with the expectation that water will find its way through flat soil. Without an effective grade, water can remain in the line, freeze in some climates, collect sediment, or back up toward the downspout. A buried pipe that has no dependable outlet is a concealed container, not a functioning drainage path.
If the property has several low areas, a recurring wet zone, or runoff from roofs and paved surfaces, evaluate the broader drainage pattern. A single downspout line may help one location while leaving the main water problem unchanged. TX Gutter Solutions can review the gutter and water path together through its gutter services options.
What are common underground downspout drainage mistakes?
Choosing the outlet last
The most common planning error is beginning at the downspout and digging until the available trench ends. The outlet should be chosen first. If the final point is not safe and stable, the route needs to change before excavation starts.
Ignoring the existing gutter system
A buried drain cannot compensate for a gutter that is blocked, badly pitched, loose, or leaking. Inspect and clean the collection system so the water entering the pipe is controlled. If the gutter cannot keep up with roof runoff, adding underground pipe alone may not resolve overflow.
Using too many sharp bends
Every bend adds resistance and another joint. Tight turns can also collect leaves and sediment. Use a direct route with gentle changes where the property allows, and include access for maintenance when the design needs it.
Creating a hidden low spot
A trench can look uniform while the pipe inside contains a dip. That dip may hold water and debris. Set and test the pipe before covering it, and recheck the grade after the bedding and connections are in place.
Discharging beside another problem area
Moving water away from one foundation wall only to release it beside a patio, retaining wall, landscape bed, or neighboring property is not a complete solution. Consider the full downstream path, including what happens after the outlet releases water.
Burying inaccessible components
Cleanouts, junctions, transitions, and emitters need to remain serviceable. Mark their locations and keep them at a finished elevation that allows inspection. A drainage system that cannot be reached may require more excavation when a blockage occurs.
Backfilling without testing
Testing after the trench is closed makes corrections harder. Test the connection, pipe route, and outlet while each part remains visible. Confirm that water arrives at the intended point and that no section leaks or backs up.
How can you prevent underground downspout clogs?
Start with the roof collection system. Keep leaves, twigs, and roof debris from building up in the gutter. Inspect the downspout opening and elbows because a blockage above ground can look like a buried-pipe failure. If the property has heavy tree cover, a leaf protection system may reduce the amount of debris entering the gutter, but it still requires inspection and proper fit.
Keep the outlet visible and clear. Grass, mulch, soil, and leaves can cover an emitter or restrict a daylight outlet. After strong rainfall, check whether water reaches the outlet and whether the receiving area remains stable. If flow slows over time, investigate before the pipe backs up to the gutter.
Plan cleanouts when the route is long, has several bends, or connects more than one source. A cleanout should be placed where a technician or homeowner can safely open it. Do not use a hidden junction as a substitute for an accessible maintenance point.
For more on leaf protection choices, review the guide to gutter leaf guards. The right approach depends on the roof, surrounding trees, gutter condition, and maintenance plan.
Can you connect every downspout to one underground line?
Not necessarily. Combining downspouts changes the amount of water entering the line and may require larger pipe, stronger connections, a different outlet, or a separate drainage layout. The receiving area must also handle the combined discharge without erosion or pooling.
Map each downspout before combining anything. Note the roof section it serves, the approximate route length, and the elevation to the proposed outlet. Consider whether a blockage in the shared line would affect several roof areas at once. In some properties, separate outlets provide better control and easier troubleshooting.
Junctions should be installed in a way that supports flow rather than forcing one line directly against another. They should remain accessible when practical. If a shared system includes multiple roof sections, a professional should verify capacity and discharge conditions rather than relying on a visual connection test.
When should you hire a drainage professional?
Call for a professional assessment when the route is close to utilities, hardscape, retaining walls, or structural features; when the yard lacks a clear outlet; or when water problems continue after basic gutter cleaning and downspout checks. Professional help is also sensible for long runs, multiple downspouts, steep grades, flat lots, recurring erosion, or a history of foundation or drainage concerns.
A professional can assess the gutter collection points, downspout connections, grade, pipe route, outlet, and surrounding site as one system. That broader view can prevent a narrow fix from shifting water into another problem area. Ask for a clear explanation of the proposed route, outlet, access points, testing process, and site restoration.
TX Gutter Solutions serves homeowners across Austin, San Antonio, and defined DFW service areas. You can review the service areas before requesting help. For Austin-specific gutter and drainage context, see the Austin gutter service page.
What should you ask before approving the work?
A clear conversation helps you understand what the system is intended to do. Ask questions such as:
- Where exactly will the water discharge?
- How was the route and grade selected?
- What existing gutter or downspout issue must be corrected first?
- How will the pipe be protected and supported in the trench?
- Where will cleanouts, junctions, and emitters be located?
- How will the line and outlet be tested before backfilling?
- What areas will be restored after the trench is closed?
- What should the homeowner inspect after rainfall?
The answers should describe a complete water path, not just a buried pipe. They should also make clear what is included in the work and what remains outside the planned scope. Direct explanations are especially important when a drainage route affects landscaping, access, or other parts of the property.
Frequently asked questions
Can I bury a downspout extension myself?
Some homeowners can handle a short, simple route after locating utilities and confirming a safe outlet. The work becomes less suitable for a do-it-yourself project when the route is long, the grade is uncertain, utilities or hardscape are nearby, several downspouts will be combined, or the property has recurring water problems. The key is not only digging the trench but creating a tested path that remains serviceable.
Should the underground pipe be solid or perforated?
The answer depends on the purpose of the line. A pipe intended to carry concentrated downspout water to a defined outlet generally needs to preserve that flow rather than release it along the trench. A dispersal or infiltration design may use different components and site preparation. Do not substitute perforated pipe simply because it is available; choose the system based on where the water needs to go.
How far should a downspout outlet be from the house?
There is no single distance that works for every property. The outlet needs to discharge far enough away, or into a designed drainage feature, so water does not return toward the foundation or collect beside the structure. Grade, soil, roof area, hardscape, and the receiving landscape all affect the appropriate location.
Why does water back up into the downspout after installation?
Possible causes include a blocked gutter, blocked pipe, low section, uphill segment, separated joint, undersized system, or outlet that cannot release water. Start by inspecting the gutter and visible outlet. If the cause is not obvious, avoid repeatedly forcing water into the line. A camera inspection or professional assessment may be needed to locate the obstruction or grade problem.
Can an underground downspout line solve standing water in the yard?
It can help when the standing water comes from a specific downspout and the new line carries that water to a suitable outlet. It will not solve every yard drainage problem. Surface runoff, compacted soil, low grading, irrigation, roof overflow, and water from other properties may contribute. Treat the downspout line as one part of the site drainage plan when the wet area has several sources.
How do you maintain the system after installation?
Inspect the gutter and downspout at least when seasonal debris accumulates and after severe weather. Look for overflow, loose fasteners, damaged elbows, and debris at the connection. Check the outlet after rainfall. Water should appear at the intended point without pooling around the foundation or eroding the receiving surface.
Keep grass, mulch, and leaves from covering the emitter or outlet. Watch for trench settlement, surface cracking, sinkholes, or a new wet strip along the route. These signs may indicate a leak, collapsed section, joint separation, or soil movement. Address small changes before they become difficult to locate.
Record the route, outlet location, connection points, and any cleanouts. Share that information with anyone planning landscaping, fencing, irrigation, or other excavation. The line is easier to maintain when its location and purpose are known.
What is the practical takeaway?
Installing underground downspout drainage is a water-management project, not simply a trench-and-pipe task. Begin with the gutter and downspout, choose the outlet before digging, verify the grade, locate utilities, build a stable route, test every connection, protect the discharge area, and keep access points serviceable.
Schedule a free gutter and drainage consultation
If the route, grade, outlet, or existing gutter condition is uncertain, a clear site assessment can help you choose a dependable next step for your home.