
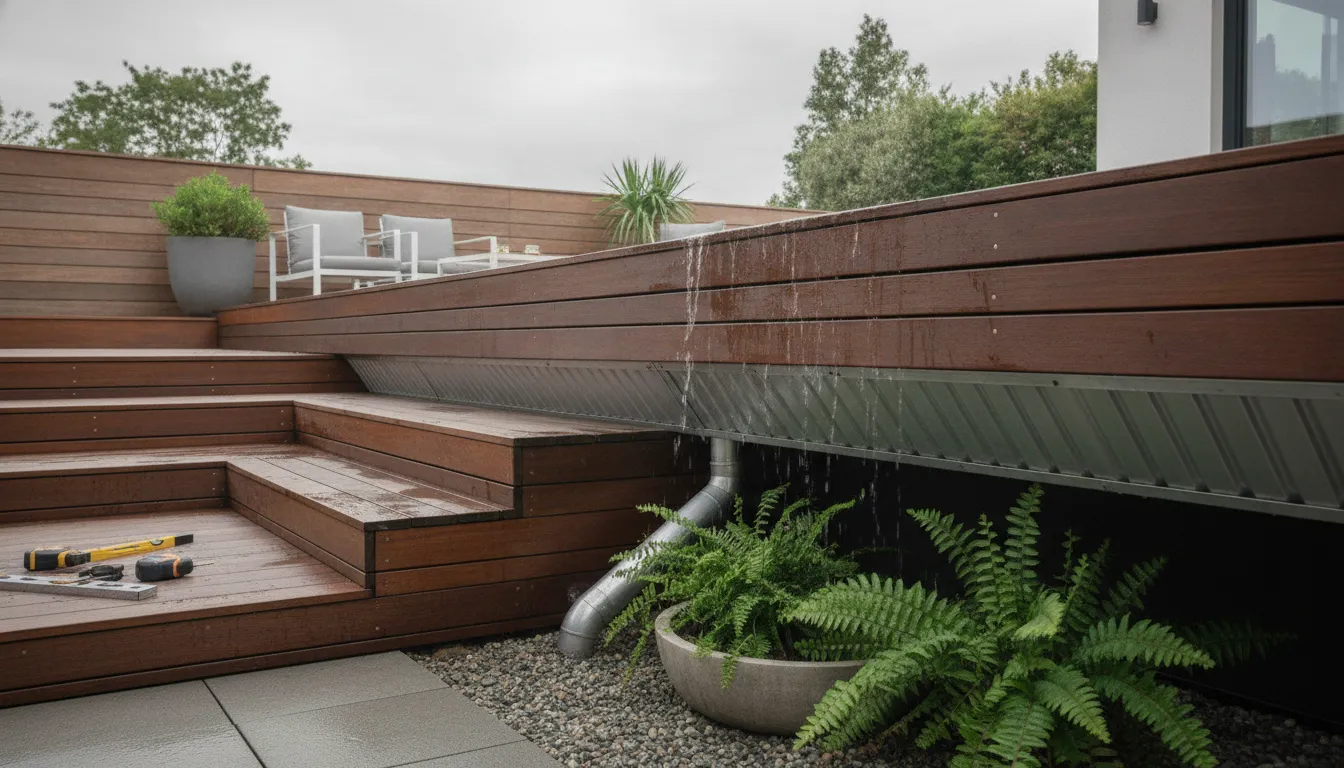
The space beneath your deck can become a comfortable outdoor area, but only if rainwater stays under control. Drips between deck boards can leave patios wet, damage stored items, and keep the framing damp after every storm. A properly planned deck drainage system collects that water and sends it toward a safer outlet. However, not every product fits every structure. Your deck’s clearance, framing condition, joist spacing, roof runoff, grading, and foundation location all matter. Before choosing panels or troughs, learn how the system will fit your property and where the water will discharge. The right plan protects your deck and the surrounding home.
Key Takeaways
- Match the system to the deck: Consider the deck’s age, height, framing, joist layout, clearance, and intended use when choosing between an over-joist or under-joist design.
- Plan the full water route: Connect deck drainage with gutters, downspouts, grading, or underground lines to carry water away from the foundation, patio, landscaping, and walkways.
- Protect the investment with proper care: Inspect framing before installation, seal seams and wall connections, maintain access for cleaning, clear debris regularly, and review warranty terms in writing.
Deck Drainage: What It Is and Why It Matters
Deck drainage is a water-management system that collects rainwater passing through deck boards and directs it away from the structure. Without a planned drainage path, runoff can soak joists, beams, patios, landscaping, and the soil around your foundation. Repeated moisture exposure may lead to staining, mold, wood rot, erosion, and costly repairs.
A well-designed system does more than keep the space below a raised deck dry. It helps protect the deck frame, makes the area underneath more comfortable to use, and connects the deck to the property’s broader drainage plan. For Central Texas properties, that plan may also include seamless gutters, downspouts, and drainage solutions designed around the home’s foundation, grading, and landscaping.
How Under-Deck Systems Capture and Redirect Rainwater
Under-deck systems typically use troughs, panels, or waterproof membranes to collect rainwater and guide it toward a gutter or outlet. The installation method depends on whether the system sits above or below the deck joists.
An over-joist system is installed on top of the framing before the deck boards go down. Since the waterproof layer covers the joists, rainwater has less opportunity to reach the wood structure. This option works best for a new deck or a major rebuild.
An under-joist system attaches beneath the framing of an existing deck. Rain passes through the gaps between the boards, reaches the panels or troughs, and flows toward a collection channel. This approach can help create a dry area below the deck without removing every deck board. The Deck Store’s explanation of deck drainage systems offers a helpful overview of both methods.
Every system still needs the correct slope, secure seams, wall flashing, and a reliable outlet. If any of these details are overlooked, water may leak, pool, or drain too close to the home.
Compare Deck Drainage With Gutters, Downspouts, and Foundation Drainage
Deck drainage and roof gutters address related but separate runoff concerns. Roof gutters collect water from the edges of the roof, while deck drainage manages rain that falls through or across the deck structure. Downspouts then carry collected water toward a safer discharge point, such as a drainage area, dry well, or underground drain line.
Foundation drainage deals with water that reaches the soil around the home. It may include grading, swales, perimeter drains, or other measures that reduce water pressure against the foundation. A deck drainage system cannot replace these solutions, especially when the property has poor grading or recurring standing water.
The best approach treats each component as part of one water-management plan. A deck outlet should not release water beside the foundation, patio, basement entrance, or a low section of the yard. TX Gutter Solutions can evaluate how gutters and downspouts should work with deck drainage to move water away from vulnerable areas.
Protect Framing, Foundations, Patios, Landscaping, and Living Space
Rain that repeatedly reaches deck framing can shorten the service life of joists, beams, fasteners, and ledger connections. A drainage system helps limit that exposure, particularly when it includes properly sealed seams and flashing where the deck meets the home. It cannot make damaged framing sound again, so inspect the structure before installation.
Redirecting runoff also protects the space below the deck. A drier surface is more comfortable for outdoor furniture, storage, entertaining, and play. Depending on the deck’s height and layout, you may be able to use the area as a covered patio or additional outdoor living space.
Water control matters at ground level, too. Unmanaged discharge can wash soil from planting beds, damage mulch, stain concrete, and saturate the soil beside the foundation. In Central Texas, expansive clay soils can shrink and swell as moisture levels change, placing additional stress on foundations and hardscaping. A properly routed outlet helps protect the home and the surrounding landscape.
Know What Deck Drainage Can and Cannot Fix
Deck drainage can collect water from the deck and send it to a safer discharge point. It can reduce dripping below the deck, limit direct wetting of framing, and help create a more usable covered area. It may also reduce runoff across patios, walkways, and planting beds.
It cannot repair rotten joists, a failing ledger, missing wall flashing, damaged decking, or a foundation crack. It also cannot stop water entering through the roof, siding, doors, or an uphill slope. Those problems require separate repairs and may need attention before the drainage system is installed.
Even a properly installed system requires maintenance. Leaves, pine needles, dirt, and other debris can block outlets or connected gutters. Check seams and wall connections after heavy storms, and keep discharge points clear. If water continues collecting beneath the deck, inspect the grading, downspout placement, roof runoff, and framing condition. A property-specific water-management assessment can help identify the actual source.
Spot Moisture Damage Beneath a Deck
Look for water stains, darkened wood, peeling finishes, and rust around fasteners. Soft or crumbly wood is a more serious warning sign. You may also see sagging areas, cracked boards, warped trim, or a musty smell that remains after the weather dries.
Mold and mildew can develop on framing, siding, concrete, and stored furniture. Persistent dampness may attract insects and create slippery surfaces. If the area below the deck has limited airflow, moisture can remain trapped and increase the risk of deterioration.
Check the ground after a storm. Puddles near posts, erosion around footings, muddy planting beds, and water moving toward the foundation all suggest that runoff needs a better route. Also note where roof downspouts discharge in relation to the deck.
Do not probe severely damaged wood or use an unstable deck. Photograph problem areas, keep the space clear, and arrange an inspection. A qualified professional can distinguish surface staining from structural damage and determine whether drainage work should happen alongside deck or framing repairs.
Clear Up Common Myths About Leaks, Value, and Need
Myth: Every under-deck system leaks.
Leaks can result from poor design, installation errors, damage, or neglected maintenance. Correct slope, weather-resistant materials, sealed seams, proper flashing, and a clear outlet all affect performance. This guide to under-deck drainage explains why installation quality matters.
Myth: Deck drainage is useful only for finished patios.
A finished ceiling can make the space more attractive, but basic water diversion may be enough to protect framing, landscaping, and concrete. The right choice depends on the deck’s height, access, appearance, and intended use.
Myth: A deck drainage system replaces gutters.
It does not. Deck drainage handles water at the deck, while roof gutters and downspouts manage roof runoff. Both systems may be necessary to keep water away from the foundation.
Myth: Drainage is unnecessary if the deck looks fine.
Early moisture damage often remains hidden above a ceiling, beneath deck boards, or around ledger connections. Preventive planning can be less disruptive than removing finished decking after rot appears. Regular inspections and clear discharge paths help identify problems before they spread.
Choose the Right Deck Drainage System
The right deck drainage system depends on how your deck is built, how you plan to use the space below it, and where the collected water needs to go. A system designed for new construction may not be practical beneath an existing deck. Deck height, joist spacing, surface boards, roof runoff, local rainfall, and access for future maintenance all affect the decision.
Before choosing a product, inspect the deck framing and map the complete water path. Rainwater should move away from the structure, into a properly sized gutter or downspout, and toward a safe discharge point. A system that collects water but releases it beside the foundation can still contribute to erosion, pooling, and moisture damage.
See TX Gutter Solutions’ Custom Water-Management Approach
Deck drainage works best as part of a complete water-management plan, not as an isolated product. TX Gutter Solutions can evaluate how water moves across the roof, deck, siding, foundation, landscaping, and surrounding grade. This helps determine whether the deck needs its own collection system, a connection to new or existing gutters, or a dedicated discharge route.
A property-specific assessment may also reveal poor grading, undersized downspouts, damaged flashing, clogged gutters, or signs of foundation moisture. The goal is to direct water away from the home without creating erosion or pooling in another area.
TX Gutter Solutions provides gutter and exterior protection services throughout Central Texas. During a consultation, homeowners can discuss the deck layout, water concerns, and possible drainage options. A free estimate can outline recommended materials, collection points, downspouts, discharge locations, and related repairs.
Use Over-Joist Troughs for New Decks
Over-joist drainage systems are installed before the deck boards go down. Troughs, membranes, or shaped panels sit on top of the joists and direct water toward a gutter or downspout at the deck’s edge. Because the framing is shielded from water above, this approach can help reduce rot and protect fastener connections.
This option is usually most practical during new construction or a major deck rebuild. The installer can plan the slope, flashing, joist layout, and outlet locations before installing the surface boards. The boards must also be compatible with the drainage layer, since the system may affect fastener placement and spacing.
The Deck Store’s overview of deck drainage systems explains how over-joist systems help keep water away from wood framing. Although this approach requires planning early in the project, it can provide dependable moisture protection beneath the finished deck.
Use Under-Joist Panels for Existing Decks
Under-joist systems are installed beneath the deck framing, making them a practical choice when the deck boards are already in place. Panels or troughs collect water from the underside and direct it toward a gutter or outlet. This can help create a drier area below the deck without removing the entire surface.
The tradeoff is that the framing above the system may still become wet. Moisture can remain around joists and fasteners if ventilation is poor or the panels are not sealed correctly. Before installation, check for existing rot, confirm that the system has enough slope, and plan access for cleaning and repairs.
Under-joist panels may also reduce clearance below the deck. Measure around stairs, doors, windows, posts, and utility lines before selecting a product. If you want a finished ceiling, confirm that the drainage system supports that installation and leaves enough room for ventilation.
Compare Trex RainEscape, TimberTech DrySpace, and Zip-Up UnderDeck
These systems use different designs, so compare their installation requirements rather than choosing by brand alone. Trex RainEscape uses troughs and downspouts to collect water and move it away from the deck. It is often considered during new deck construction, when the drainage layer can be installed before the boards.
TimberTech DrySpace uses vinyl panels beneath the joists. The panels collect water between deck boards and route it toward an outlet, creating a more finished appearance below the deck. Joist spacing, deck height, and existing framing must be checked before installation.
Zip-Up UnderDeck combines an under-joist ceiling with water drainage. Its panels can create a cleaner finished surface while directing water away from the area below. Review each manufacturer’s requirements for compatible decking, slope, ventilation, access, and warranty coverage. Reliable performance also depends on sealed connections and a suitable discharge route.
Choose Between Finished Ceilings and Basic Water Diversion
Start by deciding how you want to use the space below the deck. If you only need to keep rain off a patio, outdoor furniture, or a walkway, a basic water-diversion system may be enough. This approach focuses on collection, slope, outlets, and dependable discharge.
A finished under-deck ceiling offers a different result. It can create a more comfortable outdoor living area and conceal parts of the drainage system, but it may require additional framing, trim, lighting coordination, and access panels. The ceiling should not block ventilation or make future repairs unnecessarily difficult.
Below-joist systems can support a finished ceiling, while over-joist systems generally focus on protecting the deck frame before surface boards are installed. Polyguard’s comparison of under-deck drainage panels explains this distinction. Discuss the desired appearance, available height, maintenance needs, and budget before selecting a system.
Match the System to Deck Boards, Joist Spacing, Access, Height, and Use
Measure the deck before comparing products. Record its length and width, joist spacing, slope, board type, height, stairs, posts, walls, and existing drainage connections. These details determine whether a system will fit and how much usable clearance will remain beneath the deck.
Consider how you use the space below it. An area used for dining, storage, or entertaining needs dependable drainage and a clean discharge path. If the system includes removable panels or access points, place them where inspections and cleaning will be practical. Do not cover electrical equipment, vents, hose bibs, or service areas without a plan for access.
The Trex RainEscape installation guidance recommends confirming structural compatibility and planning for maintenance. A professional installer can also identify framing repairs, flashing concerns, and low-clearance problems before materials are ordered. This preparation helps ensure the system fits the deck, protects the structure, and sends water where it belongs.
Compare Deck Drainage Systems
The right deck drainage system should do more than catch occasional drips. It should collect water consistently, handle sudden downpours, and direct runoff away from the deck framing, foundation, patio, and landscaping. A system that works for a small elevated deck may not be suitable for a larger structure beneath a roofline or balcony.
When comparing options, look beyond the product name and price. Review the system’s capacity, material, installation method, wall connections, access points, and maintenance requirements. You should also consider how it will connect to gutters, downspouts, grading, or underground drainage.
The best choice depends on the deck’s size, joist layout, height, age, and intended use. An existing deck may require an under-joist retrofit, while a new deck can often use a drainage system installed before the decking boards. The finish below the deck also matters. Basic water diversion may be enough for a storage area, while a finished ceiling may call for a more coordinated design.
TX Gutter Solutions can help connect deck drainage with a broader water-management system designed for your property. A site-specific assessment can identify where water collects, how it should leave the deck area, and whether the existing gutters or downspouts need attention.
Evaluate Capacity for Heavy Rain and Roof Runoff
Start by estimating how much water the system may receive. A deck beneath a small roof overhang has different drainage needs than one positioned below a large roof section, upper balcony, or roof valley where runoff gathers. In heavy rain, undersized troughs, outlets, or downspouts can overflow.
Ask how the system handles water that falls through the deck boards and runoff that reaches the deck from nearby rooflines. Under-deck systems collect and redirect rainwater, snow, and spills to create a drier area beneath an elevated deck, as Advantage Lumber explains.
Your installer should size the outlets and downspouts for the property, then route discharged water away from the foundation. If roof runoff enters the system, confirm that the complete drainage path can manage the combined volume.
Compare PVC, Aluminum, and Other Weather-Resistant Materials
Material selection affects how a drainage system handles heat, storms, debris, fasteners, and seasonal movement. PVC and other polymer membranes are lightweight and flexible. Aluminum panels provide a more rigid option for some deck designs. Polyethylene membranes are also available, with some products designed to fit between deck joists. For example, Goberco identifies its under-deck membrane as 30-mil linear low-density polyethylene.
Do not compare materials by thickness alone. Ask how each option handles ultraviolet exposure, temperature changes, punctures, standing water, and attachment points. The material should match the deck’s joist spacing and the finish you want below it.
A professional installer can explain whether a panel, trough, or membrane system suits the deck and local conditions. TX Gutter Solutions provides custom exterior water-management services for properties throughout Central Texas.
Check Seams, Flashing, Wall Connections, and Leak Resistance
Many drainage problems begin at transitions rather than in the middle of a panel. Water can enter where sections meet, where the deck connects to the house, around fasteners, or where runoff flows into a gutter or downspout. Ask how each area will be sealed and whether flashing is included in the installation scope.
Seams should be covered with compatible tape or sealant, and penetrations should receive careful attention. Trex RainEscape recommends sealing seams and screw penetrations to reduce leak risks. Wall connections require particular care because water can travel behind siding or trim when flashing is incomplete.
Request an explanation of the outlet design, edge treatment, wall flashing, and leak-testing process. A properly installed system should direct water toward its intended outlet instead of allowing it to collect against the house or deck framing.
Reduce Water Absorption, Trapped Moisture, Thermal Movement, and Rot
A deck drainage system protects more than the area beneath the deck. It can reduce repeated wetting of joists, beams, posts, siding, patios, and stored items. Limiting water exposure may help reduce staining, swelling, mold growth, and wood rot, but drainage cannot replace repairs to framing that has already deteriorated.
Trapped moisture remains a concern when a system blocks airflow or holds water against the framing. Ask how the design supports ventilation and allows materials to expand and contract as temperatures change. Flexible membranes and rigid panels move differently, so the attachment method and spacing matter.
The area below the deck should dry efficiently after storms. Polyguard describes how drainage panels protect deck framing while making the space below an elevated deck more usable. Before installation, have the framing inspected and repair damaged wood rather than covering it.
Plan for Removable Panels, Debris, Cleaning, and Maintenance
Leaves, pine needles, dirt, and other debris can collect above drainage panels or inside channels. Without regular cleaning, buildup may restrict water flow and keep wet material against the framing. Before choosing a system, ask how you will access the drainage area after installation.
Some designs include removable panels or accessible sections for inspections. Polyguard notes the value of removable panels when debris collects above a drainage system. Access is especially useful around outlets, corners, wall connections, and areas beneath trees.
Your maintenance plan may include clearing the deck surface, inspecting gutters, flushing downspouts, checking seams, and removing debris from accessible channels. If the system sits beneath a finished ceiling, confirm whether panels can be removed without damaging the finish. Include these tasks in your regular gutter maintenance plan so minor blockages do not become larger water problems.
Coordinate Finishes and Permanent LED Lighting
An under-deck drainage system can create a drier, more comfortable area for seating, storage, entertaining, or outdoor work. If you plan to add a ceiling, soffit, fans, speakers, or lighting, make those decisions before installation. The drainage layout, access panels, wiring routes, and support points should work together from the start.
A finished ceiling can improve the appearance of the space, but it may make inspections and repairs more difficult. Plan removable access points near outlets, seams, and electrical connections. Lighting should also account for water exposure, fixture access, and safe installation.
Permanent LED lighting can add practical illumination and improve the look of an under-deck area. TX Gutter Solutions offers permanent exterior lighting with app-controlled operation, which can suit outdoor seating and entertaining spaces. Discuss drainage and lighting together so the final design remains functional, serviceable, and protected from water.
Estimate Deck Drainage Costs
Deck drainage costs depend on more than the price of a membrane or panel kit. Your estimate should account for the deck’s size, construction, height, access, drainage route, and the condition of the framing. A simple system beneath a low deck may require far less labor than a retrofit that involves removing boards, repairing rot, adding downspouts, and routing water through underground lines.
Material prices vary by product and system design. Some under-deck drainage products cost approximately $4 to $9 per square foot, while basic membrane, sealing tape, and downspout components may cost closer to $2 per square foot. These figures can help with early planning, but they do not represent a complete installed price. Product kits, shipping, fasteners, flashing, labor, and site-specific work can change the final total. Trex RainEscape’s installation guide explains how drainage components collect and direct water beneath a deck.
Compare Material, Labor, Square-Foot, and Installed Prices
Ask for pricing in more than one format so you can compare estimates fairly. A contractor may quote materials by the square foot, labor by the project, or one installed price that combines products, preparation, and drainage connections. Each format can be useful, but a low material price may not include the work needed to install and seal the system properly.
Request a written breakdown that lists the drainage product, tape, flashing, outlets, gutters, downspouts, fasteners, and labor. Under-deck drainage products from Advantage Lumber show how prices can vary between individual components and complete packages.
When reviewing labor, ask whether the estimate includes sealing seams, connecting outlets, testing water flow, and cleaning the work area. These details affect performance and should not be treated as optional extras.
Compare New-Deck Installation With Existing-Deck Retrofits
A new deck usually offers the simplest opportunity to install drainage. An over-joist system can be placed before the decking boards go down, creating a continuous water-shedding layer and helping protect the framing from above. Since the structure is open, the crew may spend less time working around finished surfaces and existing obstacles.
An existing deck often requires a different approach. Under-joist panels or membranes can be installed from below without removing every deck board, but access may be tight and the framing may already show signs of moisture damage. If boards must come up, labor and disposal costs increase.
Ask the contractor which installation method fits your deck and why. Polyguard’s overview of under-deck drainage panels explains the difference between systems installed above the joists and those fitted beneath them. The right choice depends on your deck’s condition, future plans, and desired finish.
Account for Deck Size, Height, Framing, and Site Access
Square footage is only one part of the estimate. A large, open deck may be straightforward to cover, while a smaller deck with multiple levels, stairs, posts, beams, and tight corners can take considerably more time. Deck height also affects setup, material handling, worker safety, and the amount of space available beneath the structure.
Tell the contractor about obstacles before the site visit. Mention screens, hot tubs, outdoor kitchens, privacy walls, storage areas, or landscaping that could limit access. A deck connected to the house may also require careful detailing where the drainage system meets the wall, ledger, or existing gutter line.
The framing layout matters, too. Joist spacing, beam locations, slope, and damaged members can affect product selection and installation time. A property-specific assessment from TX Gutter Solutions can help show how deck drainage should connect with the property’s larger water-management system.
Include Decking Removal, Reinstallation, and Frame Repairs
Retrofit estimates should clearly state whether decking removal is included. Some systems can be installed from below, but repairs near the ledger, joists, or wall connection may require access from above. Removing boards can add costs for labeling, storage, replacement fasteners, disposal, and reinstallation.
Ask the contractor to inspect the framing before finalizing the scope. Soft joists, split boards, corroded fasteners, damaged flashing, and poor ledger connections should be addressed before a drainage system covers them. Installing new panels over deteriorated framing can hide a problem instead of solving it.
Replacement decking may also affect the budget if boards break during removal or are already too damaged to reuse. A transparent estimate should separate known repairs from possible concealed conditions. If additional damage appears after the deck is opened, request photographs and an updated price before approving the work.
Add Gutters, Outlets, Downspouts, and Underground Drainage
A drainage system needs a reliable place to send collected water. Depending on the design, water may flow into an under-deck gutter, through outlets and downspouts, onto properly sloped ground, or into an underground drain line. The cost of these components should appear separately in the estimate.
Downspout placement matters. Discharging water beside the foundation, into a planting bed, or against a patio can create new moisture problems. A longer downspout run, catch basin, pop-up emitter, or buried line may cost more, but it can direct water farther from the structure and help protect nearby landscaping.
Coordinate the deck system with the home’s existing gutters. TX Gutter Solutions’ gutter and exterior services include gutters, downspouts, and drainage solutions, making it easier to evaluate the property as one connected water-management system.
Weigh Maintenance, Service Life, Warranties, and Long-Term Value
The least expensive system is not always the best value. Consider how often the system needs cleaning, whether debris can collect above or below the panels, and how easy it will be to inspect seams and outlets. A finished ceiling may look attractive, but removable access panels can make future maintenance simpler.
Review the expected service life of the materials and ask how they perform in strong sun, temperature changes, heavy rain, and repeated expansion and contraction. Confirm whether the warranty covers the product only or includes installation workmanship. Manufacturer warranties may also have requirements for approved installation, maintenance, and repairs.
Some products advertise warranties of up to 25 years, but coverage terms vary. Read the exclusions before comparing offers. A durable system that protects the deck framing, patio, foundation, and usable space beneath the deck may provide better long-term value than a lower-priced product that requires frequent repairs.
Know What a Transparent Estimate Includes
A useful estimate should describe the project in enough detail that you can compare it with another bid. Look for the deck dimensions, system type, material quantities, joist spacing, finish selection, and installation method. The estimate should also identify how water will leave the system and where each downspout or drain line will discharge.
The scope should list preparation work, decking removal, frame repairs, flashing, wall connections, sealing, cleanup, and disposal. Ask whether permits, engineering, delivery, taxes, and restoration of disturbed landscaping are included. If concealed conditions could change the price, the estimate should explain how those changes will be documented and approved.
Confirm warranty details in writing, including the product term, workmanship coverage, maintenance responsibilities, and exclusions. You can request a free estimate from TX Gutter Solutions and use the site visit to discuss deck drainage, gutters, downspouts, and foundation protection together.
Check Seasonal Discounts, Package Prices, and Current Promotions
Promotions can reduce the initial cost, but compare the complete scope before choosing a discounted package. A lower price may apply only to the drainage panels and exclude outlets, downspouts, flashing, labor, or disposal. Ask whether the offer covers your deck’s size and layout or only standard installations.
Package pricing may help when you need several connected services. Combining deck drainage with seamless gutters, downspout extensions, drainage improvements, or maintenance could reduce repeat labor and create a more coordinated system. Confirm that each service is listed separately so you understand exactly what you are paying for.
Check the expiration date, eligibility rules, deposit requirements, and warranty terms for any promotion. Some suppliers advertise discounts of up to 50% on selected products, but availability and conditions vary. Before committing, compare the final installed price with the standard quote, then confirm current offers directly through TX Gutter Solutions’ contact page.
Plan Your Deck Drainage Installation
A reliable deck drainage system starts with planning, not with panels or troughs. The design should account for the deck’s structure, the amount of water it receives, the condition of the framing, and where collected water will go. A system that captures rain but releases it beside the foundation may simply move the problem to another area.
Before choosing materials, inspect the deck and surrounding property. Look for rot, loose connections, staining, ponding, soil erosion, and water collecting near the home. Review how the deck connects to the wall, where stairs and posts interrupt the drainage path, and whether existing gutters or downspouts can handle the added flow. TX Gutter Solutions can help coordinate deck drainage with gutter and exterior water-management services throughout Central Texas.
Inspect the Frame, Ledger, Flashing, Joists, and Existing Gutters
Start with the frame, ledger, joists, beams, posts, and fasteners. Soft wood, dark staining, musty odors, rusted hardware, and sagging areas can indicate moisture damage. Repair damaged framing before covering it, since a drainage system can make hidden problems more difficult to find.
Pay close attention to the ledger and wall connection. Missing or damaged flashing may allow water into the structure, even when the drainage panels themselves do not leak. Joists should be reasonably straight and spaced correctly for the selected system. Inspect existing gutters and downspouts as well. They may need cleaning, repair, replacement, or additional capacity before receiving water from the deck.
Check the ground below the deck, too. Water needs a clear route away from the foundation, patio, walkways, and landscaping. A property-specific water-management assessment can help identify drainage concerns that may not be visible from above.
Install Over-Joist Systems Before Laying Decking
Over-joist systems sit on top of the deck framing and beneath the decking boards. Because the drainage layer rests above the joists, it captures water before it reaches the structural wood. This makes the approach useful for new decks or projects where the decking has been removed.
Installation requires careful planning around joist ends, beams, posts, stairs, and the house wall. The system needs a consistent path toward its outlets, with seams and edges sealed according to the manufacturer’s instructions. Do not install the decking until the membrane, troughs, flashing, and outlets have been inspected.
This approach can help keep the frame drier, but it does not replace sound construction. The ledger still needs proper flashing, the framing must be in good condition, and the finished deck must allow water to drain freely. Plan gutter and downspout locations before installing the decking to avoid removing boards later.
Retrofit Under-Joist Systems Beneath Finished Decks
Under-joist systems are installed below the deck framing, making them practical for many existing decks. Depending on the product, panels or troughs collect water that passes between the deck boards and direct it toward a gutter or outlet. This can create a drier area below the deck without removing all the decking.
Available clearance is important. Measure from the lowest joist to the patio, grade, or planned ceiling. Posts, beams, stairs, lights, fans, and doors can affect the layout. A low deck may not have enough space for both drainage and a finished ceiling, while a taller deck may accommodate both.
Inspect the underside for rot, insect damage, loose wiring, and plumbing conflicts before beginning. Repair structural concerns first. The retrofit should preserve access to connections, cleanouts, and outlets. If you may add a ceiling later, choose a system that leaves room for that finish and does not block future maintenance access.
Manage Decking, Posts, Stairs, Obstructions, and Low Clearance
Deck drainage rarely involves a completely open rectangle. Posts, beams, stairs, railings, air-conditioning equipment, hose connections, and exterior doors can interrupt the water path. Mark these features before ordering materials, then plan a route around them without leaving gaps.
Deck boards can also affect performance. Narrow gaps may limit cleaning access, while wide or uneven gaps can send more water into the system during a storm. Confirm that the selected product is compatible with the decking material and joist spacing. Do not assume a standard detail will work around every post or stair stringer.
Low clearance deserves special attention. A drainage system may reduce headroom beneath the deck, particularly when paired with a finished ceiling. Check door swings, walkways, furniture placement, and access to hose bibs or storage areas. Keep outlets accessible, and avoid creating low spots where water can collect instead of flowing toward its discharge point.
Seal Seams, Penetrations, Fasteners, and Wall Connections
Small installation gaps can cause significant leaks. Seal seams, end laps, corners, outlet connections, and transitions according to the product instructions. Use compatible tape, sealant, flashing, and fasteners instead of combining materials without checking manufacturer guidance.
Wall connections require extra care because the deck meets the home at this point. The drainage layer should connect to suitable flashing and shed water away from the wall. Do not rely on caulk alone to correct missing or poorly installed flashing. Sealant can wear out, while properly integrated flashing creates a more dependable water-shedding path.
Plan penetrations before installation. Posts, lights, speakers, fans, and fasteners can puncture membranes or interrupt panels. Where a penetration is necessary, use the recommended boot, collar, tape, or sealant detail. After installation, test the system with a controlled flow of water and inspect the underside for drips before adding a ceiling or other finish.
Route Water to Gutters, Downspouts, Grade, or Drain Lines
Collected water needs a planned destination. Depending on the property, a deck drainage system may discharge into a gutter, connect to a downspout, flow across a properly graded surface, or enter an underground drain line. The right option depends on deck height, soil conditions, roof runoff, nearby hard surfaces, and the distance from the foundation.
Avoid releasing water directly beside the house. Even a well-sealed system can contribute to foundation problems if its outlet empties into a low area near the footing. Downspouts should direct water away from the structure or connect to a suitable drainage route. Underground lines need adequate slope and a safe discharge point.
Coordinate the deck system with roof gutters. When roof and deck runoff share a downspout, the combined volume may exceed the capacity of a small outlet. A custom seamless gutter installation can help create a connected system with outlets and downspouts sized for the water they need to carry.
Prevent Debris, Trapped Moisture, Poor Ventilation, and Rot
Deck drainage systems need access for inspection and cleaning. Leaves, pine needles, dirt, and small debris can enter through deck gaps or collect in channels. If debris blocks an outlet, water may back up and remain against the framing. Include removable panels, accessible gutters, or cleanout points where the design allows.
Ventilation matters beneath the deck, especially when a finished ceiling encloses the area. Trapped humidity can encourage mildew and keep wood damp after rain. Do not seal an under-deck area without considering airflow, drainage access, and the ceiling materials. The space should be able to dry between storms.
Maintenance should include clearing debris, checking seams and outlets, inspecting downspouts, and looking for staining or sagging. Persistent dampness, soft wood, or recurring leaks may indicate a blockage or installation problem. Schedule gutter cleaning and system maintenance before a small issue causes broader damage.
Compare DIY and Professional Installation
A DIY installation may suit a simple, accessible deck with sound framing, a straightforward layout, and clear manufacturer instructions. The work may be easier when the decking has already been removed and the discharge point is close by. Even then, measure carefully, follow the product instructions, and test the system before closing in the underside.
Professional installation is often the better choice when the deck connects to the house, the framing needs repairs, the site has limited clearance, or water must travel through several drainage components. Experience helps with flashing, difficult penetrations, outlet placement, and transitions around stairs and posts. These details often determine whether the system stays dry during heavy rain.
Ask for a written scope that identifies repairs, drainage materials, outlets, downspouts, disposal, testing, and warranty coverage. The contractor should explain what the system will address and what it cannot correct, such as major grading problems or damaged foundation components. TX Gutter Solutions provides free estimates and can coordinate deck drainage with the broader water-management needs of your property.
Compare Deck Drainage Reviews, Warranties, and Promotions
Choosing a deck drainage system involves more than comparing product photos and starting prices. Reviews can show how a system performs during heavy rain, how well it fits different deck designs, and how the installer responds when a problem appears. Warranties add another layer of protection, but only when you understand what they cover and who is responsible for the work.
Compare the product, installation company, and complete project scope separately. A manufacturer may cover the drainage materials, while the installer covers labor and workmanship. These protections can have different time limits, maintenance requirements, and exclusions.
For a Central Texas property, ask how the system handles sudden storms, roof runoff, debris, and discharge near the foundation. The completed system should direct water away from the structure instead of simply collecting it beneath the deck. It may also need to connect with seamless gutters, downspouts, or an underground drainage line.
Before choosing a contractor, review TX Gutter Solutions’ gutter and exterior protection services and request a written estimate. This gives you a clearer basis for comparing materials, labor, drainage connections, warranty coverage, and current promotions.
Compare Recent Ratings and Review Counts
Look at the average rating and the total number of reviews. A high rating based on only a few comments may not tell you as much as a slightly lower rating supported by years of detailed feedback. Focus on recent reviews because crews, products, installation methods, and service policies can change.
Search for projects similar to yours. A ground-level patio cover, two-story deck, and low-clearance deck may require different installation methods. Pay attention to comments about communication, scheduling, cleanup, water routing, and how the company handled questions after the work was finished.
Reviews can also reveal whether the area beneath the deck stayed usable and dry. As Deck Drain Experts explains, controlling water beneath a deck may help reduce moisture-related concerns, including mold and mildew growth.
Look for Feedback on Leaks, Debris, Heavy Rain, Fit, and Support
Do not stop at comments about appearance. Look for specific feedback on leaks during heavy rain, water movement at seams, debris buildup, wall connections, and the system’s fit around posts, stairs, lights, and other obstructions. These details often reveal more than a short review saying the crew was friendly.
Check whether customers mention support after installation. Did the company return to inspect a leak? Were maintenance questions answered clearly? Did the installer explain how to clean the system and where water would discharge?
A drainage system should match the deck and property rather than function as a one-size-fits-all product. US Quality Construction notes that concerns about frequent leaks are common, making system selection and installation quality important parts of the review process.
Separate Product Performance From Installer Workmanship
A review may criticize a product when the actual issue came from installation. Poorly sealed seams, incorrect slopes, weak flashing, or an improperly connected downspout can cause leaks even when the drainage material is sound. The reverse can also happen, when a careful installer is limited by a product that does not suit the deck.
When reading reviews, separate product comments from workmanship comments. Product feedback may mention panel durability, water capacity, expansion, discoloration, or compatibility with certain decking. Workmanship feedback may mention measurements, fastening, sealant, flashing, cleanup, and communication.
Ask the contractor how the system protects joists and framing, not only how it keeps the space below dry. As Admiral Spacemaker explains, water can still reach framing in some trough-style designs, so the installation plan should address the entire structure.
Compare Manufacturer and Workmanship Warranties
A manufacturer warranty typically covers the drainage product itself. It may apply to material defects, premature failure, or specific performance issues. A workmanship warranty comes from the installer and may cover errors such as failed seams, incorrect installation, or poor flashing.
These warranties are not interchangeable. A manufacturer may deny a claim if the system was installed incorrectly. An installer may exclude damage caused by modified products, neglected maintenance, severe weather, or changes made by another contractor.
Ask for both warranties before signing. Confirm the coverage period, claim process, required documentation, and whether the installer is authorized to install the product. A properly installed system can make the area beneath a deck more usable, a benefit discussed by Trex RainEscape, but the warranty should explain how that performance is supported.
Check Coverage, Maintenance Duties, Exclusions, and Transfer Rules
Read the warranty language instead of relying on a sales summary. Check whether coverage includes leaks, corrosion, fading, fastener failure, sealant failure, and damage to connected gutters or downspouts. Some warranties cover replacement materials but not labor, removal, access, or disposal.
Maintenance responsibilities matter, too. You may need to keep the deck surface, gutters, outlets, and surrounding drainage paths clear of leaves and sediment. A warranty could become limited if debris causes standing water or if another contractor alters the system.
Ask whether the warranty transfers to a future homeowner. Transfer rules may require registration, proof of purchase, an inspection, or written notice within a specific period. Keep the contract, product information, receipts, photographs, and maintenance records together to support a claim if needed.
Verify Discounts, Promotions, and Package Prices
Promotions can reduce the project price, but compare the complete scope before treating a discount as a bargain. One estimate may include drainage panels, flashing, outlets, gutters, downspouts, and cleanup, while another may list only the primary material.
Ask whether a promotion applies to the entire project or only selected products. Confirm the expiration date, minimum project size, installation requirements, financing terms, and whether discounts can be combined. Also ask whether removing and reinstalling existing decking is included.
A package price can be useful when deck drainage is coordinated with seamless gutters and downspouts. Make sure the proposal identifies each component and its quantity. The final price may change if the crew discovers damaged framing, difficult access, extra outlets, or a need to carry water farther from the foundation.
Confirm the Scope and Warranty in Writing
Before work begins, request a written proposal explaining what the crew will install and how the completed system will move water. The scope should identify the drainage product, deck area, installation method, flashing, seams, outlets, gutters, downspouts, discharge points, and cleanup.
It should also state what is not included. Examples may include deck repairs, replacement boards, framing corrections, underground drain lines, grading work, landscaping restoration, or electrical work for lighting. Clear exclusions help prevent unexpected charges and make competing estimates easier to compare.
Ask the contractor to include manufacturer and workmanship warranty details in the agreement. Keep copies of the product warranty, care instructions, photos, and final invoice. If the project also includes permanent lighting, coordinate that work with the drainage installation and review TX Gutter Solutions’ permanent lighting options. A written scope gives you a reliable reference for maintenance, future service, and warranty questions.
Plan Deck Drainage for Central Texas Properties
Deck drainage should be planned around the entire property, not selected from a product list alone. Central Texas homes can experience intense rainfall, changing soil moisture, sloped lots, and limited space between structures. Without a clear discharge path, water may collect beneath the deck, run toward the foundation, wash out landscaping, or damage patios and walkways.
Start by inspecting the deck, roof runoff, existing gutters, downspouts, grading, soil, and available clearance. The goal is to collect water beneath or through the deck, then direct it to a stable outlet away from the home. TX Gutter Solutions provides custom gutter and exterior water-management services that can be coordinated with a deck drainage plan.
A property-specific assessment should also account for how the deck is used. A covered outdoor living area may need a more finished drainage solution than an open deck used mainly for access. Low decks may require removable components for maintenance, while taller decks may have room for gutters, downspouts, and a finished ceiling below.
Serve Austin, Cedar Park, Leander, Round Rock, and Georgetown
Deck drainage needs can vary significantly across the Austin area. A raised deck on a sloped lot may require a different discharge route than a low deck built close to the foundation, retaining wall, or property line. Begin by identifying where water collects during storms and whether the deck receives runoff from the roof, an upper-level balcony, or nearby hardscaping.
Homeowners in Austin, Cedar Park, Leander, Round Rock, and Georgetown should consider deck size, joist direction, soil conditions, access, and the distance to a suitable outlet. The location of existing gutters and downspouts also matters. TX Gutter Solutions lists these communities among its Central Texas service areas, making a local assessment a useful starting point for planning the full drainage route.
Serve San Antonio and Bexar County
San Antonio and Bexar County properties may include limestone, shallow soil, sloped terrain, established landscaping, and patios that leave little room for a new discharge line. Releasing water directly beside the deck can cause erosion, muddy paths, standing water, or recurring dampness near the foundation.
A complete plan should show the route from the deck to its final discharge point. Depending on the property, that route may include a gutter, downspout, splash block, buried drain line, or graded swale. The design should also preserve access for cleaning and repairs, particularly when the deck sits close to the ground. Review TX Gutter Solutions’ services when coordinating deck drainage with gutters, downspouts, and broader property drainage in the San Antonio area.
Serve Dallas-Fort Worth Communities, Including Plano, Frisco, Arlington, and McKinney
In the Dallas-Fort Worth area, deck drainage must fit both the structure and the lot. A solution that works on a tall, open deck may not be suitable for a low deck with limited ventilation, tight property setbacks, or little room between the foundation and fence.
Homeowners in Dallas, Fort Worth, Plano, Frisco, Arlington, McKinney, and nearby communities should review roof runoff, deck height, soil movement, drainage easements, and existing downspout locations. TX Gutter Solutions serves more than 30 DFW communities, allowing the deck to be considered as part of the property’s larger water-management system.
Match Drainage Capacity to Sudden Storms and Roof Runoff
A deck drainage system needs enough capacity for the water it receives. A deck beneath a roof edge, upper deck, or roof valley may collect much more water than the deck surface sheds on its own. If the system is undersized, water may back up, spill over the sides, or remain against the framing.
Ask how many collection channels and outlets the design includes, along with the amount of water each outlet can handle. The system should direct water away from the home through properly sloped channels, gutters, downspouts, or drain lines. Do not assume that one outlet is sufficient without considering the deck’s size, roof area, and likely runoff volume.
Protect Clay Soils, Foundations, Landscaping, Patios, and Outdoor Spaces
Water that is poorly directed from a deck can affect more than the structure above it. Repeated discharge beside a foundation may contribute to erosion and uneven soil moisture. It can also wash away mulch, damage planting beds, stain patios, and leave outdoor living areas damp.
This is especially important on lots with expansive clay soils, where changes in moisture can contribute to soil movement. A drainage plan should send water to a stable outlet while protecting landscaping and hardscaping that may be difficult to repair. It should also preserve access to patios, storage areas, seating, and any living space beneath the deck.
Connect Deck Drainage With Seamless Gutters and Downspouts
Deck drainage works best when it connects cleanly with the home’s existing gutter system. An under-deck channel, for example, may discharge into a gutter that carries water to a downspout. The downspout must then release water a safe distance from the foundation or connect to a suitable drain line.
Inspect the roof gutters before installing deck components. Clogged gutters, inadequate downspouts, poor slope, and leaking seams can place extra demand on a new deck drainage system. Seamless gutter installation can help create a continuous water path with fewer joints along the home’s roofline.
Check Grading, Clearance, HOA Rules, and Local Requirements
Before installation, inspect the grade around the deck and confirm that water will not flow toward the foundation, a neighboring property, or a public walkway. Low-clearance decks may require a different approach because access, ventilation, and future maintenance are more limited.
Review HOA rules before changing the deck ceiling, adding visible gutters or downspouts, or altering exterior finishes. Local permits or inspections may apply if the project changes the deck structure, drainage route, or connection to an existing system. A written proposal should identify the discharge point, materials, access needs, maintenance expectations, and any requirements that must be addressed before work begins. Homeowners can contact TX Gutter Solutions to discuss a property-specific assessment and request a free estimate.
Plan Deck Drainage With TX Gutter Solutions
Deck drainage works best when it is planned as part of the property’s complete water-management system. A trough or panel beneath the deck may collect rain, but that water still needs a reliable route to a gutter, downspout, drain line, or suitable discharge area. Without that connection, rainwater can collect near the foundation, wash out landscaping, or remain trapped beneath the deck.
TX Gutter Solutions takes a property-specific approach to exterior water management. The team can review the deck, roof runoff, existing gutters, grading, landscaping, and current drainage conditions before recommending a solution. This helps homeowners avoid choosing a system based only on deck size or product appearance.
A complete plan should account for where water starts, how much runoff reaches the deck, how the structure is built, and where collected water can safely go. It should also consider future plans for the space, such as an under-deck ceiling, outdoor seating, storage, or permanent lighting. Explore TX Gutter Solutions’ water-management services to see how deck drainage can fit into a broader exterior protection plan.
Request a Property-Specific Water-Management Assessment
Every deck has different drainage needs. An assessment should consider the deck’s height, joist layout, nearby walls, posts, stairs, slope, and access points. The condition of the framing matters, too. Rot, staining, soft wood, loose fasteners, or water marks may point to problems that should be addressed before a drainage system is installed.
The assessment should also include roof areas that drain toward the deck. Runoff from a large roof plane may exceed the capacity of a small deck outlet, especially during a heavy storm. TX Gutter Solutions can review these connections and recommend a practical way to collect and redirect rainwater. Share photos and known problem areas when requesting an evaluation so the conversation starts with useful information.
Coordinate Deck Drainage, Seamless Gutters, Downspouts, and Discharge
A deck drainage system is only one part of the installation. Collected water needs to flow into a properly sized gutter or outlet, then through a downspout and away from the home. If the discharge point is too close to the foundation, the system may simply move water from beneath the deck to another problem area.
Seamless gutters can reduce leak points along the deck edge, while correctly placed downspouts help manage concentrated flow. In some cases, a downspout may connect to an underground drain line or a surface outlet directed toward a stable area. TX Gutter Solutions can coordinate seamless gutters and drainage solutions so the components work together rather than serving as separate fixes.
Design a Drainage Path That Protects the Foundation and Landscaping
Water should move away from the house without eroding soil, flooding planting beds, or pooling beside the foundation. Drainage troughs and panels generally need a slight slope toward their collection point. The exact layout depends on the deck structure and available discharge route, so installers should confirm the direction of flow before securing the system.
Pay close attention to where water leaves the downspout. A short extension may be enough for one property, while another may need a buried drain line, pop-up emitter, or grading adjustment. The right option depends on soil conditions, foundation clearance, patios, walkways, and landscaping. A well-planned drainage path helps protect the home while keeping nearby outdoor areas usable.
Review Materials, Scope, Maintenance, and Warranty Coverage
Ask what each component is made of and how it is expected to perform in heat, heavy rain, and repeated temperature changes. PVC panels, aluminum components, vinyl ceilings, flashing, sealants, and fasteners can all affect service life. The right material depends on the deck’s construction, appearance, access, and expected water volume.
Before work begins, review exactly what the estimate includes. Confirm whether it covers decking removal, frame repairs, flashing, gutters, outlets, downspouts, underground drainage, cleanup, and final testing. You should also understand how to access the system for inspection and debris removal. Product warranties and workmanship coverage are different, so ask what each one covers and whether maintenance requirements affect a claim.
Coordinate Under-Deck Finishes With Permanent App-Controlled LED Lighting
An under-deck drainage system can create a cleaner, more usable space, especially when it includes a finished ceiling or soffit. If you plan to add seating, storage, an outdoor kitchen, or lighting, mention those goals before installation. Electrical routes, access panels, ceiling materials, and drainage components should be planned together.
TX Gutter Solutions also installs permanent exterior LED lighting that can be controlled through an app. Lighting placement may affect ceiling panels, posts, trim, and access points, so coordinating both projects can prevent unnecessary cutting or later rework. Ask how fixtures, wiring, drainage access, and waterproofing will work together before approving the final layout.
Request a Transparent Free Estimate for Your Austin, San Antonio, or DFW Property
A useful estimate should explain the proposed system, materials, labor, drainage route, exclusions, and warranty coverage. It should also identify conditions that may change the price, such as damaged framing, difficult access, decking removal, unusual joist spacing, or underground drainage work. This gives you a clearer basis for comparing options.
TX Gutter Solutions offers free estimates for properties in Austin, San Antonio, Dallas-Fort Worth, and surrounding communities. When you request an estimate, share photos, deck dimensions, known leak locations, and concerns about foundation moisture or landscaping erosion. Ask whether the project can include gutter installation, repairs, cleaning, leaf protection, or other exterior water-management work so the estimate reflects your full drainage needs.
Frequently Asked Questions
Can deck drainage prevent water from reaching my foundation?
It can help by collecting rainwater beneath or through the deck and directing it to a safer discharge point. The system must connect to properly placed gutters, downspouts, or drain lines. It cannot correct serious grading problems, foundation damage, or roof leaks on its own.
Is deck drainage better for a new deck or an existing deck?
Both new and existing decks can use drainage systems. Over-joist systems are usually easier to install during new construction because they sit beneath the decking boards and help shield the framing. Under-joist systems are often more practical for existing decks, although available clearance, framing condition, and access must be reviewed first.
How much maintenance does an under-deck drainage system require?
Regularly clear leaves, dirt, and pine needles from the deck surface, gutters, outlets, and downspouts. Inspect seams, wall connections, and discharge areas after heavy storms. If the system has a finished ceiling, confirm that removable panels or other access points allow future inspections and cleaning.
Can deck drainage connect to my home’s gutter system?
Yes, depending on the deck design and the capacity of the existing gutters and downspouts. The connection should be sized for the expected runoff and should release water far enough from the foundation. A professional assessment can determine whether the current system needs cleaning, repairs, additional downspouts, or replacement.
What should I ask for in a deck drainage estimate?
Request a written scope that identifies the drainage method, materials, flashing, outlets, gutters, downspouts, discharge location, labor, cleanup, and warranty coverage. Ask whether the price includes framing repairs, decking removal, underground drainage, and access panels. TX Gutter Solutions offers free estimates for homeowners in Austin, San Antonio, Dallas-Fort Worth, and nearby communities.