
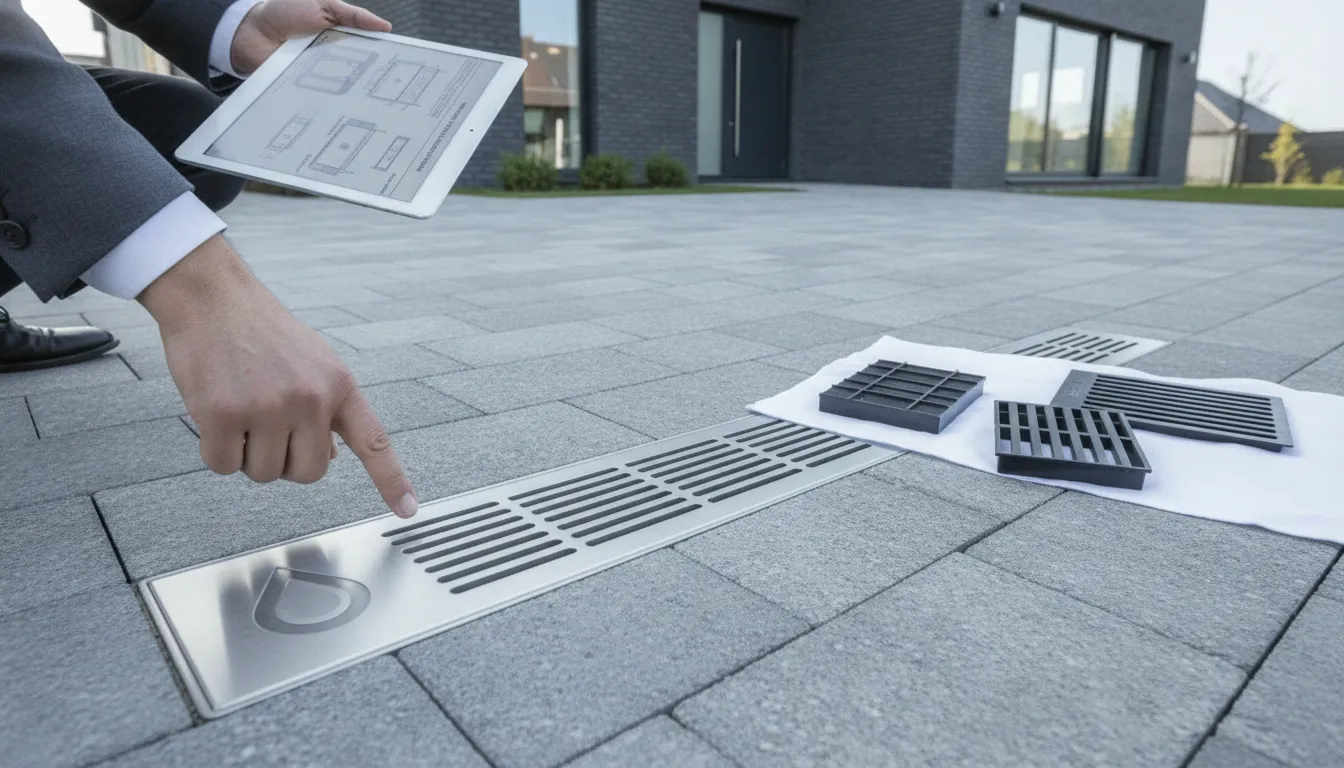
When rainwater rushes down a driveway toward the garage, even a small drainage problem can become costly. Water may seep beneath the garage door, collect beside the foundation, or carry soil and mulch into unwanted areas. A channel drain for driveway applications can catch runoff at a low point and move it away through solid underground piping. However, the drain must be sized for the area it serves and supported properly beneath vehicle traffic. From material choices and load ratings to installation costs and maintenance, this guide covers the key decisions homeowners should make before starting a driveway drainage project.
Key Takeaways
- Trace the water before choosing a drain: Identify where runoff starts, how it crosses the driveway, and where it can discharge safely without affecting the garage, foundation, landscaping, or neighboring property.
- Select components for the site: Match the channel size, outlet capacity, grate rating, materials, and concrete support to the driveway’s runoff volume, vehicle traffic, soil, and weather conditions.
- Treat installation and upkeep as one plan: Set the drain at the proper elevation, seal each connection, test water flow, and clear leaves and sediment regularly to maintain reliable performance.
What Is a Channel Drain for a Driveway?
A channel drain is a long, narrow drainage system installed across a driveway or another paved surface. A grated opening catches rainwater at ground level, then directs it through an underground pipe to a suitable discharge point. Because the drain spans the width of the driveway, it can intercept runoff before it reaches a garage, crosses a walkway, erodes soil, or collects near the foundation.
Channel drains are also called trench drains or linear drains. They differ from standard gutters, which collect roof runoff, and French drains, which collect water below the ground. The right solution depends on where water is traveling, how much runoff the area receives, and whether the existing grading gives the water a safe path away from the home. A complete drainage assessment can help identify which system fits the property.
Compare channel, trench, and French drains
“Channel drain” and “trench drain” often refer to the same type of system. Both use a narrow channel covered by a removable grate to collect surface water from driveways, patios, pool decks, and garage entrances. The channel typically connects to solid underground piping through an end outlet or bottom outlet.
A French drain works differently. It sits below grade and usually includes perforated pipe surrounded by gravel or drainage fabric. Instead of catching water from the pavement, it collects water moving through the soil. This makes it useful for saturated landscaping, hillside runoff, and some groundwater concerns. A channel drain is generally better suited to visible sheet flow across a hard surface. In some yards, both systems may be needed to manage surface and subsurface water.
See how linear drains capture driveway runoff
Rainwater can move across a driveway as a broad sheet, especially when the pavement slopes toward the garage or another low point. A channel drain interrupts that flow. Water enters through the grate, collects inside the channel, and moves toward an outlet pipe. Central Pro Supply describes channel drains as systems that collect runoff from large impervious surfaces without requiring a change to the surface grade.
A common installation location is directly outside the garage threshold. This placement helps keep runoff from entering the garage during heavy rain. The drain still needs enough width, depth, and outlet capacity for the area it serves. A narrow channel may not handle runoff from a wide or steep driveway, especially when intense rainfall, sediment, and restricted discharge are part of the problem.
Place drains at garage thresholds and low points
The most effective location is often where water already gathers. For many properties, that means installing the channel across the driveway just outside the garage door. Positioned on the exterior side of the threshold, it can intercept runoff before water reaches the slab or flows beneath the door.
Other locations may include the bottom of a sloped driveway, a transition between concrete sections, or a low area beside a retaining wall. Observe the pavement during and after rain. Look for water moving toward the garage, collecting along one edge, or remaining in puddles after surrounding areas have dried.
The drain must also sit at the correct elevation and have a stable base. Its grate should be flush with, or slightly below, the surrounding pavement so water can enter instead of flowing over it. Regular maintenance matters too. NDS recommends removing debris and flushing the channel to help maintain consistent flow.
Connect channel drains to gutters and downspouts
A channel drain can work alongside roof gutters and downspouts as part of a larger water-management system. Gutters collect roof runoff, while downspouts carry it to the ground. If a downspout releases water beside the driveway, that flow may add to the runoff entering the channel. Directing the downspout into a suitable solid pipe can help control both water sources.
A channel drain may connect through an end outlet, bottom outlet, catch basin, or cleanout before water reaches the discharge point. The connecting pipe needs adequate capacity and a safe destination. It should not release water beside the foundation, undermine the driveway, or send runoff toward a neighboring property.
Avoid connecting several drainage lines to one undersized outlet. Too much incoming water can overwhelm the pipe and cause backups at the channel. A professional can assess the complete system, including gutters, downspouts, and drainage solutions, before recommending a connection plan.
Spot pooling that threatens pavement, landscaping, or foundations
Standing water can create problems beyond a muddy driveway. Repeated pooling may soften soil, wash away mulch, expose plant roots, and contribute to erosion. Water that remains near concrete can enter cracks and joints, reach the base material, and contribute to settlement or pavement damage over time.
Pay close attention to pooling near the garage, foundation, retaining walls, and driveway edges. Heavy Central Texas storms can send a large volume of water across a paved surface in a short time. Without a controlled path, runoff may collect against the home or move into nearby landscaping.
A channel drain may help when the main issue is surface runoff on pavement. It will not correct every drainage problem, however. Poor grading, clogged gutters, damaged downspouts, saturated soil, and undersized discharge pipes may also contribute to pooling. An inspection from a local drainage professional can identify the source and help protect both the foundation and surrounding landscape.
Size a Channel Drain for Driveway Runoff
Choosing a channel drain involves more than measuring the driveway’s width. The system must collect water from every surface that slopes toward it, handle the expected rainfall, and move water through an outlet that can carry the volume away. A drain that is too small may overflow, while an oversized drain can add unnecessary excavation and material costs.
Start by mapping the runoff path, then compare the channel’s dimensions, flow capacity, grate design, and outlet requirements. If the driveway receives water from gutters, downspouts, a sloped yard, or nearby pavement, include those sources in the plan. TX Gutter Solutions can assess drainage and downspout solutions alongside driveway drainage to create a more complete water-management strategy.
Measure the driveway’s catchment area and runoff path
Measure the driveway’s length and width to estimate its paved catchment area. Then look beyond the driveway itself. A sidewalk, patio, roof, downspout, sloped lawn, or neighboring hard surface may send additional runoff toward the proposed drain.
Watch the property during rainfall, if possible. Note where water starts moving, where it pools, and whether it travels toward the garage, landscaping, or foundation. A channel drain generally needs to span the full width of the runoff path. Installing a short section only where water visibly pools may allow flow to pass around the ends.
The driveway’s slope matters, too. A steep surface may send water quickly toward the channel, while a nearly level surface may need careful grading to direct water into the grate. Include nearby downspouts in the assessment so their discharge does not overwhelm the system.
Match channel width, depth, length, and outlet size
Channel width affects how much water can enter the drain, while depth and internal volume affect how water moves through it. The channel should cover the area where runoff crosses the driveway. Any gaps at the ends can give water a route around the drain.
Review the manufacturer’s flow tables before selecting a channel size. These tables show the expected capacity under specific conditions, including channel dimensions, slope, and outlet configuration. Do not evaluate the grate or channel body separately from the pipe beneath it.
Outlet size is especially important. A wide channel connected to an undersized pipe may back up during heavy rain. A 4-inch smooth-wall pipe may handle the flow in some residential installations, while corrugated pipe may require a larger diameter because its ridged interior creates more resistance. Confirm the pipe material, length, fittings, and slope as part of the complete system.
Compare drainage capacity with rainfall intensity
Rainfall intensity describes how much rain falls during a short period. A channel that handles light, steady rain may not manage a sudden thunderstorm. Proper sizing commonly considers the drainage area, rainfall intensity, and runoff coefficient. Central Pro Supply’s channel drain guidance explains how these factors work together in drainage calculations.
Concrete and asphalt shed much of the rainfall they receive, so they usually produce faster runoff than soil or planted areas. Add every hard surface that drains toward the channel, then use local rainfall information or ask a drainage professional to review the design conditions.
For Texas driveways, consider intense short-duration storms rather than sizing only for average rainfall. This is particularly important when the drain protects a garage entrance, retaining wall, landscaped slope, or foundation. A system designed for the likely flow is less likely to overflow when runoff arrives quickly.
Account for grate openings, sediment, and outlet capacity
A channel’s listed capacity assumes that water can enter through the grate and leave through the outlet without obstruction. Leaves, mulch, gravel, and sediment can reduce the open area and restrict flow. Narrow grate openings may limit larger debris, but they can also collect dirt more quickly.
Inspect the surrounding landscape for loose soil, driveway aggregate, and materials that runoff could carry into the drain. A sump or catch basin may help collect sediment before it reaches the outlet. Removable grates also make routine cleaning more manageable.
The base beneath the channel affects performance as well. If the substrate shifts, the drain can lose its intended slope or develop low spots where sediment gathers. Dakota NA’s channel drain installation guide notes that an unsuitable substrate or incorrect slope can reduce flow and contribute to blockages. Size and prepare the entire drainage path, not just the visible grate.
Choose pre-sloped or neutral-channel systems
A pre-sloped channel has a built-in fall that directs water toward an outlet. When installed correctly, its sections create a consistent grade without requiring the entire slope to be formed during excavation. This can simplify longer driveway installations or projects where the surrounding surface has limited slope.
A neutral-channel system has a consistent base elevation. The installer creates the required fall through the trench base and channel placement. This approach can provide flexibility for short drains, center outlets, or systems that discharge from both ends, but it requires careful elevation control.
Compare the manufacturer’s instructions, flow information, and available accessories before choosing a system. NDS installation guidance explains how pre-sloped options can simplify placement. Neutral systems can perform just as well when the trench base, joints, and outlets are set accurately.
Plan multiple outlets and a safe discharge point
A long driveway or large catchment area may require multiple outlets. Several outlets can reduce the volume traveling through one section and give water more than one exit route. They may also help when the safest discharge point is not located at the end of the channel.
Each outlet must connect to piping that can carry the expected flow. Direct water toward an appropriate drainage swale, approved stormwater connection, or other suitable discharge area. Do not send concentrated runoff toward a neighboring property, sidewalk, or foundation. Local requirements may apply when connecting to public drainage or changing an established flow path.
Include cleanouts or inspection access near outlets, junctions, and low points. Remove the grate and clear debris periodically, then flush the line with water to check for buildup. If the channel connects with gutters or downspouts, coordinate both systems so they discharge safely. A professional assessment from TX Gutter Solutions can help connect driveway drainage with the property’s existing water-management system.
Compare Channel Drain Materials and Load Ratings
The right channel drain depends on more than its width and price. Consider the drain body, grate material, expected traffic, local weather, and installation method together. A system that performs well beside a walkway may not withstand vehicles turning across a driveway or heavy trucks crossing a commercial entrance.
Start by identifying where the drain will sit and what it will collect. A residential driveway may receive runoff from the pavement, roof downspouts, nearby landscaping, or all three. A commercial property may also have delivery vehicles, frequent turning, and heavier loads. These conditions affect the channel size, outlet capacity, grate design, and load rating you need.
Maintenance should also factor into your decision. Removable grates make it easier to clear leaves, mulch, and sediment. Corrosion-resistant materials may perform better in exposed or damp locations, while a properly supported channel helps prevent cracking and movement. TX Gutter Solutions can evaluate drainage solutions alongside gutters, downspouts, grading, and foundation protection across Central Texas.
Compare PVC and HDPE channel bodies
PVC is lightweight, corrosion-resistant, and relatively easy to cut and install. It can be a practical choice for residential driveways, patios, and walkways when the channel has the correct base and surrounding support. PVC systems are also widely available, which may make replacement parts easier to find.
HDPE is more flexible and impact-resistant than many rigid plastic systems. That flexibility can help in areas exposed to soil movement, temperature changes, or heavier traffic. It may be a better fit when the channel needs to tolerate demanding outdoor conditions.
Do not choose based on body material alone. Check the complete system’s load rating, grate compatibility, outlet design, and concrete support requirements. NDS installation guidance explains how the channel base and surrounding concrete affect long-term performance.
Consider polymer concrete and concrete systems
Polymer concrete channels combine aggregate with resin to create a dense, strong body suited to heavier-duty applications. Compared with lightweight plastic systems, they are less likely to flex under vehicle loads when installed on a stable base and supported according to the manufacturer’s specifications.
Traditional concrete systems can provide a durable option for permanent installations, especially where the drain forms part of a larger concrete surface. However, concrete is heavy and generally requires more preparation, equipment, and labor. Poor support, soil movement, or improper curing can still lead to cracking or shifting.
Compare capacity, dimensions, outlet options, and installation requirements instead of assuming the heaviest channel is automatically the best choice. Dakota’s channel drain guide explains how material selection and site conditions influence a system’s suitability.
Compare galvanized steel, stainless steel, cast iron, and ductile iron grates
Galvanized steel grates offer a practical balance of cost, strength, and rust resistance. They can work well for many residential driveways, although scratches or damage to the protective coating may leave the steel more vulnerable to corrosion over time.
Stainless steel provides excellent corrosion resistance and a clean appearance. It may suit properties near pools, outdoor kitchens, or other areas where moisture and appearance are important. It typically costs more than galvanized steel.
Cast iron grates are strong and durable, but their weight can make handling and installation more difficult. Ductile iron combines high strength with some flexibility, making it a common option for areas with frequent vehicle traffic. Compare dimensions, finishes, opening styles, and rated uses in the manufacturer’s driveway trench drain selection.
Match A15, B125, C250, or D400 ratings to driveway traffic
Load ratings indicate how much weight a grate and channel system is designed to handle in a defined application. A15 is generally intended for pedestrian areas and locations without vehicle traffic. B125 is commonly used for light vehicle areas, including many residential driveways and parking spaces.
C250 is intended for medium-duty traffic, such as areas where vehicles turn, cross frequently, or place extra force on the grate. D400 is designed for heavy-duty applications, including roads, commercial loading zones, and industrial traffic areas.
A residential driveway may not require D400, but an undersized rating can lead to cracked grates, damaged channel edges, or movement around the drain. Consider vehicle weight, turning forces, traffic frequency, and soil conditions rather than choosing by rating alone. This load-rating guide provides a useful overview of common A15, B125, C250, and D400 applications.
Meet complete installation requirements for each load rating
A load rating applies to the complete installed system, not just the grate. The trench, base, side support, concrete encasement, joints, and surrounding pavement all affect performance. A heavy-duty grate installed over a weak or poorly compacted base can still fail under vehicle loads.
Vehicle-rated drains often require concrete support around the channel. The manufacturer may specify concrete strength, trench dimensions, reinforcement, curing time, and the required support beneath and beside the channel. Follow those instructions instead of relying on the product label alone.
Correct elevation also matters. Set the grate flush with the driveway or slightly below the surface so water can enter without creating a trip edge. Review the NDS channel drain installation steps before cutting concrete or excavating the driveway.
Compare UV, corrosion, freeze-thaw, and Texas weather resistance
Driveway drains face more than vehicle weight. Sun exposure can affect some plastics, while standing water, fertilizer, salts, and soil chemicals may contribute to corrosion. Central Texas properties also experience intense heat, heavy storms, shifting soils, and occasional freezing temperatures.
HDPE and polymer concrete are often selected for their resistance to outdoor exposure and temperature changes. Still, performance depends on the specific product, installation quality, and surrounding materials. Check whether the channel, grate, seals, and outlets are rated for the conditions at your property.
Think about what happens after water leaves the channel, too. A corrosion-resistant drain cannot prevent erosion if its outlet discharges onto soil beside a foundation or driveway. Dakota’s material guidance can help you compare options for UV exposure, freeze-thaw cycles, and demanding weather.
Choose grates for traction, debris control, and curb appeal
A grate should allow water to enter efficiently while remaining safe for pedestrians and vehicles. Textured surfaces can improve traction on sloped driveways or areas that stay wet. Choose openings that support the expected runoff without creating hazards for tires, shoes, bicycles, or small wheels.
Maintenance matters as well. A removable grate makes it easier to clear leaves, mulch, and sediment from the channel. Locking grates may be useful where security, tampering, or repeated vehicle movement is a concern. Confirm that the grate can still be removed with the tools and access available at the property.
Finally, choose a finish that suits the driveway. Galvanized, black, stainless steel, and decorative grates create different visual effects. Compare drainage performance and maintenance needs first, then select a style that complements the property. A coordinated plan can also address gutter cleaning and leaf protection throughout the drainage system.
Compare Channel Drain Features, Brands, and Reviews
A channel drain is only as reliable as the parts that make up the complete system. The channel body, grate, outlet, end caps, seals, and access points must work together to collect and move water without leaking, shifting, or clogging. When comparing products, look beyond the drain’s width and appearance. Consider how easily you can clean it, how well it handles driveway traffic, and whether replacement parts will be available later.
Your choice should also fit the drainage plan for your property. Confirm where runoff will enter, where the outlet will send it, and whether the discharge point can handle the expected water volume. A channel drain may need to connect with downspouts, solid drainage pipe, catch basins, or other components. Reviewing NDS channel drain installation guidance can help you compare dimensions, compatible fittings, and installation requirements.
For properties in Austin, San Antonio, Dallas, and surrounding communities, local soil, intense rainfall, landscaping, and driveway traffic can all affect performance. A drainage professional can assess the channel drain alongside your gutters, downspouts, grading, and foundation protection plan. TX Gutter Solutions provides drainage and gutter services tailored to the needs of Central Texas properties.
Choose removable or locking grates for cleaning and safety
Removable grates make routine maintenance more convenient. You can lift them out to remove leaves, gravel, mulch, and sediment from the channel, then flush the interior with water. This access is especially helpful on driveways bordered by trees or garden beds, where debris can collect after storms.
Locking grates provide additional stability and security. Fasteners help keep the grate from shifting under vehicle traffic and make it harder for children or pets to remove. Check whether the grate requires a special tool, and confirm that replacement screws or clips are available.
For most residential driveways, choose a grate that offers a practical balance of access, traction, and strength. Review the manufacturer’s maintenance instructions before buying, particularly if the system requires a specific tool for grate removal.
Add cleanouts, sumps, end caps, outlets, and inspection access
A channel drain requires more than a channel and grate. End caps close unused openings, while outlets direct collected water into solid pipe, a dry well, an approved stormwater connection, or another suitable discharge area. Choose the outlet configuration before ordering so the channel and fittings match.
Cleanouts and inspection points provide access to the pipe after installation. They are useful when the outlet run is long, changes direction, or passes beneath concrete and landscaping. A sump or catch basin can collect heavier sediment before it reaches the outlet, which may reduce blockages and simplify cleaning.
Include these components in the initial drainage plan rather than adding them after installation. Dakota’s channel drain guide recommends planning outlets, end caps, and access points as part of the complete system. Confirm each component’s size, connection type, and location before excavation starts.
Compare modular, expandable, preassembled, and pre-sloped kits
Modular systems let you combine channel sections, outlets, corners, end caps, and other fittings to suit the driveway layout. This flexibility can help when the drain follows a long garage entrance, collects water from several directions, or needs to connect with an existing drainage line. Expandable systems may also work well if you expect to extend the drain later.
Preassembled kits include several components in one package, which can simplify product selection for smaller projects. Pre-sloped systems include a built-in fall that directs water toward the outlet. This design can make it easier to maintain consistent flow along a longer run.
Neutral-channel systems have a level interior and rely on the trench base or stepped installation to create the required slope. Compare the installation method, section lengths, outlet locations, and compatible fittings before choosing. NDS Dura Slope specifications provide an example of how pre-sloped sections connect within a complete system.
Check joint seals, watertight connections, and replacement parts
Channel sections should connect securely so water stays inside the system and reaches the planned outlet. Look for clear instructions covering joints, end caps, outlet fittings, and sealing materials. Depending on the product, connections may require gaskets, sealant, solvent welding, or another method specified by the manufacturer.
Watertight joints matter when the drain runs beside a garage slab, concrete driveway, or landscaped area. Leaks can wash out the surrounding base and create settlement. The channel must also remain aligned while concrete is placed around it. Positioning brackets or installation supports can help prevent movement during the pour.
Before buying, check whether replacement grates, seals, fasteners, outlets, and end caps are sold separately. A damaged grate should not require replacing the entire drain. Vodaland’s driveway trench drain products show how some systems offer separate components for installation and maintenance.
Shortlist reputable brands using flow tables and testing standards
Start with manufacturers that publish installation dimensions, flow information, load ratings, and material specifications. A detailed technical guide gives you more useful information than a product page that lists only the drain’s length and width. Flow data can help you determine whether the channel and outlet are suitable for the runoff reaching your driveway.
Check which testing or classification standards apply to the grate and channel. Load ratings are meaningful only when the system is installed according to the manufacturer’s requirements. These requirements may include a specific trench depth, concrete encasement, base material, and surrounding surface.
Do not assume that a heavy-looking grate is suitable for every driveway. Some plastic systems are intended for pedestrian or light-duty use, while others are designed for residential vehicles, commercial entrances, or heavier traffic. Swiftdrain’s Pro Series information shows the type of performance and application details worth reviewing.
Compare warranties, product availability, and compatible accessories
A warranty can provide useful information about a manufacturer’s confidence in its product, but read the terms carefully. Check the coverage period and exclusions for incorrect installation, vehicle loading, chemical exposure, movement, or freeze damage. A warranty does not replace accurate sizing or proper installation.
Product availability matters too. Confirm whether channels, grates, outlets, cleanouts, and replacement parts are stocked by local suppliers or shipped by the manufacturer. If one component becomes unavailable, maintaining the complete system may become difficult.
Compare package contents before judging the price. One kit may include grates, end caps, and outlets, while another may require you to purchase each piece separately. Check dimensions, connection sizes, grate styles, and accessory compatibility. Be cautious with product pages that omit flow calculations, installation dimensions, warranty terms, or shipping details.
Use reviews to assess clogging, warping, leaks, and installation difficulty
Customer reviews can reveal practical issues that product descriptions may not mention. Look for repeated comments about grates that warp in hot weather, channels that shift during concrete placement, leaking joints, or outlets that clog with sediment. A pattern across several reviews is more useful than one unusually positive or negative comment.
Reviews can also help you estimate installation difficulty. Pay attention to reports about unclear instructions, missing hardware, difficult grate removal, or trouble connecting outlet pipe. These details may affect labor costs even when a kit appears simple.
Use reviews alongside technical specifications, not in place of them. A homeowner’s experience may involve different soil, rainfall, driveway materials, or installation methods. For concrete cutting, grading, utility concerns, or drainage work near a foundation, professional installation can reduce the risk of expensive mistakes. A channel drain cost guide from MyBuilder also explains how site conditions and installation complexity can affect project costs.
How Much Does a Channel Drain for a Driveway Cost?
The cost of a channel drain for a driveway depends on more than the price of the drain itself. Your total may include the channel body, grate, end caps, outlets, cleanouts, excavation, concrete cutting, disposal, replacement concrete, pipe connections, and labor. Drain length, driveway material, vehicle traffic, soil conditions, and the available discharge point can all affect the final estimate.
A short drain across a garage threshold may cost much less than a long, vehicle-rated system installed through an existing concrete driveway. Before requesting a quote, identify where water collects, how it travels across the property, and where it can safely discharge. If gutters or downspouts contribute to the runoff, include them in the assessment. NDS Systems’ channel drain installation guidance explains why site conditions, slope, and installation methods matter when planning a drainage project.
Price channels, grates, outlets, and accessories
Start by pricing the complete system rather than the channel section alone. A basic setup may include a channel body and grate, but many driveway projects also need end caps, outlet adapters, cleanouts, inspection covers, joint seals, and connecting pipe. Longer drains may require multiple channel sections and additional outlets to manage water effectively.
The grate can have a major effect on cost. Plastic grates may work in lighter-use locations, while galvanized steel, stainless steel, ductile iron, or cast iron options are better suited to areas crossed by vehicles. Decorative grates can improve the appearance near a garage or walkway, although they typically cost more than standard designs.
Ask whether every required fitting is included in the quote. MyBuilder’s channel drain cost guide recommends considering channels, grates, outlets, and accessories together instead of comparing the price of the main drain section alone.
Compare installation costs by drain length, driveway surface, and project complexity
Drain length is one of the clearest cost factors. A longer channel requires more materials, excavation, connections, and time to set the system at the correct elevation. A short drain at a garage threshold may be relatively simple, while a system spanning the driveway may need several sections and more than one discharge point.
The driveway surface also affects labor. Installing a drain before new concrete or asphalt is placed is usually easier than cutting into an existing surface. Concrete may require saw-cutting, removal, reinforcement repairs, and a carefully matched replacement pour. Pavers may need to be lifted and reset, while asphalt requires clean cuts and proper patching around the channel.
Slopes, tree roots, buried utilities, tight property lines, and limited equipment access can add to the project. A contractor should inspect the full runoff path instead of pricing the channel in isolation.
Budget for excavation, concrete cutting, disposal, concrete, and labor
A complete estimate should cover the work required to prepare the trench and restore the driveway. Common costs include excavation, saw-cutting, removal of concrete or asphalt, debris disposal, trench-base materials, concrete encasement, pipe connections, and labor. If the drain connects to a buried discharge line, the project may also require additional trenching and fittings.
Concrete driveway installations need a stable base and sufficient support around the channel. Without it, vehicle weight can shift the drain, crack the surrounding pavement, or separate the joints. The finished grate should sit flush with, or slightly below, the driveway so water can enter without creating a trip hazard.
Ask contractors to separate drainage materials, installation, and surface restoration on the estimate. This makes quotes easier to compare and may reveal missing work. Dakota’s channel drain installation guide explains why the substrate and slope must be evaluated before installation, since errors can reduce flow and cause blockages.
Compare DIY savings with professional installation
A small channel drain may be suitable for DIY installation when the driveway is not yet paved, access is easy, and the trench is straightforward. You may save on labor by purchasing a kit and handling basic excavation, assembly, and cleanup yourself. Those savings depend on having the right tools, enough time, and a clear plan for elevation and discharge.
Cutting an existing concrete driveway requires specialized equipment and careful measurements. The channel also needs proper support beneath and along its sides, especially where vehicles will cross it. An incorrect slope, weak concrete encasement, or poorly sealed connection can lead to standing water and repairs that cost more than the original labor.
Professional installation is often the safer option when the project involves concrete cutting, buried utilities, grading, multiple outlets, or uncertain discharge conditions. As MyBuilder explains, correct installation can help prevent future repair costs.
Check kits, local suppliers, package pricing, and seasonal discounts
Compare complete kits with individual components before purchasing. A kit may include channel sections, grates, end caps, and an outlet, which can simplify ordering and reduce the risk of incompatible parts. For a larger driveway, buying matching sections and fittings as a package may offer better value than purchasing everything separately.
Local suppliers can help confirm product availability, replacement-part options, and delivery costs. This is especially useful when you need a specific load-rated grate or additional channel sections later. Online prices may appear lower until shipping, oversized freight, or missing accessories are added.
Ask suppliers and contractors about package pricing, bulk material discounts, and seasonal offers. Buying several drain sections, fittings, and pipe components together may reduce material costs. Still, do not choose a cheaper kit if it lacks the capacity, grate rating, outlet size, or installation support your driveway requires.
Compare estimates by capacity, load rating, installation scope, and warranty
The lowest estimate is not always the best value. Compare each quote by water-handling capacity, grate load rating, drain length, outlet configuration, concrete support, and expected service life. A system intended for pedestrian areas may not be suitable where cars, trucks, or trailers cross the drain.
Each contractor should describe the full installation scope. The estimate should state whether it includes excavation, concrete cutting, disposal, trench preparation, connections, concrete encasement, driveway restoration, flow testing, and cleanup. It should also identify who handles utility checks, permits, and discharge requirements when needed.
Ask about product and workmanship warranties, including exclusions related to pavement settlement or blocked outlets. A clear warranty matters, but proper sizing and installation matter just as much. TX Gutter Solutions can assess driveway runoff alongside gutters, downspouts, and property drainage through its drainage solutions, helping homeowners request a complete estimate rather than pricing the channel drain by itself.
Meet Channel Drain Installation Requirements
A channel drain only performs well when the trench, channel body, grate, surrounding pavement, and outlet function as one system. Driveway drainage projects often involve more than placing a grate in a shallow trench. You may need to cut concrete, excavate compacted soil, establish the correct slope, protect nearby utilities, and create a safe route for collected water.
Before starting, review the instructions for the exact channel drain you plan to install. Requirements can vary based on the channel material, grate rating, driveway surface, soil conditions, and expected traffic. For a drainage project that connects to gutters or protects your home’s foundation, review TX Gutter Solutions’ drainage services to understand how a complete water-management plan can address runoff beyond the driveway.
Decide whether you can handle a small installation
A short channel drain in an accessible area may be appropriate for an experienced homeowner with the right tools. You should be comfortable measuring elevations, excavating a straight trench, compacting the base, handling concrete, and connecting the system to a suitable outlet. You also need enough time to keep soil and wet concrete out of the channel while the work is underway.
DIY installation becomes more difficult when the drain crosses an existing concrete driveway, sits near utility lines, connects to several downspouts, or requires substantial grading. Concrete cutting and material removal may also require equipment that is costly to rent. Review a channel drain installation cost guide before deciding whether the project fits your skills, tools, and available time.
Hire a professional for concrete cutting, grading, utilities, or permits
Professional installation is often the safer choice when the project involves cutting a driveway, changing the grade, or directing water near a foundation. A qualified contractor can establish the correct elevations, create a stable trench, protect nearby surfaces, and connect the outlet without leaving low areas that collect water.
Professional help is also useful when the project may require utility locating, right-of-way approval, permits, or coordination with an existing drainage system. Mistakes below a concrete driveway can be difficult and expensive to correct after the surface is restored. A drainage professional can assess the complete runoff path instead of treating the channel as an isolated product. A professional estimate from TX Gutter Solutions can help you understand the work involved before construction begins.
Check utilities, easements, local codes, and discharge requirements
Before digging, identify underground electric, gas, water, communication, and irrigation lines. Contact the appropriate utility-locating service and mark the work area clearly. In the United States, 811 can help you request utility marking before excavation. Do not rely on old property drawings or visual guesses, particularly near garages, sidewalks, landscape lighting, and irrigation controls.
Check property easements, drainage rules, and local requirements for stormwater discharge as well. Collected water may not be directed onto a neighboring property, into a public street, or toward a building without an approved connection. The Dakota channel drain installation guide recommends reviewing site conditions and planning the drainage route before excavation. In Central Texas, local soil and rainfall conditions also deserve careful attention.
Follow the manufacturer’s trench width, depth, and base specifications
Every channel drain has specific requirements for trench dimensions, concrete coverage, bedding, connection points, and outlet placement. Follow the instructions for the exact product instead of estimating dimensions from another system. The trench must provide enough room for the channel, base, side support, and any concrete encasement required for the expected traffic.
The manufacturer may specify a minimum concrete thickness, a particular base material, or a required clearance below and beside the channel. Use those measurements when marking the excavation. NDS installation guidance explains why correct trench dimensions and concrete support matter, especially where vehicles cross the drain. A trench that is too narrow may prevent proper support, while a trench that is too shallow may leave the grate above the finished pavement.
Build and compact a stable trench base
Remove loose soil, roots, organic material, and debris from the trench. The base should be firm, properly shaped, and capable of supporting the channel without settling. Depending on the product and site, the bedding may consist of compacted aggregate, concrete, or another material specified by the manufacturer.
Place aggregate or base material in manageable layers and compact each layer thoroughly. Remove and replace soft spots instead of covering them with additional material. If the base settles after the driveway is repaired, the channel can shift, lose its intended slope, or create a depression that collects water. Dakota’s installation guidance emphasizes stable support because the channel must remain in position while surrounding concrete cures and after vehicles begin using the driveway.
Set the channel elevation and slope before connecting outlets
Set the channel elevation before attaching the outlet pipe or restoring the driveway surface. The grate should align with the finished pavement so water enters the opening rather than flowing around it. Use a string line, laser level, or another suitable tool to check the full length of the installation.
Some systems use a pre-sloped channel, while others require the installer to create the fall. Where the product permits, a gradual slope, such as approximately 1 inch over 8 feet, can help move water toward the outlet. Always confirm the required slope with the manufacturer because the correct measurement depends on the system and site. NDS installation guidance recommends checking alignment and elevation before placing the surrounding concrete, when adjustments are still manageable.
Install the grate before pouring or replacing concrete
Attach the grate to the channel before pouring concrete around it. The grate helps keep the channel aligned and prevents concrete from entering the drainage body. Cover or protect the openings and joints from wet concrete, soil, and construction debris during the installation.
Check that each grate section is seated correctly and that locks or fasteners are engaged. If the system uses separate sections, confirm that they meet cleanly without sharp edges or gaps. Installing the grate afterward can disturb the channel, damage the surrounding concrete, or leave the finished surface at the wrong elevation. Central Pro Supply’s channel drain guide explains why the grate should be in place before the concrete is poured.
Keep the grate flush with or slightly below the pavement
The finished grate should sit flush with the pavement or slightly below it, according to the product instructions and site design. This allows runoff to enter the channel while reducing the chance that tires, foot traffic, or equipment catch on a raised edge. A grate that sits too low can create a depression where sediment and standing water collect.
Use a straightedge across the driveway to check the relationship between the grate and surrounding surface. Make adjustments before the concrete sets. Dakota recommends keeping the grate close to the finished level, with the pavement slightly higher where appropriate, so surface water flows into the drain. Recheck the elevation at several points along the channel, not only at the ends.
Support vehicle loads with concrete encasement
A driveway channel drain needs more support than one installed in a pedestrian walkway. If cars or trucks will cross it, follow the manufacturer’s requirements for concrete thickness, width, strength, and curing. Many systems require a concrete base and side encasement around the channel, with a commonly specified minimum of 4 inches in vehicle areas.
Do not assume the grate’s load rating alone makes the installation suitable for vehicles. The surrounding concrete and compacted base transfer the load into the ground. Without adequate support, the channel may crack, shift, or separate from the pavement. NDS installation instructions provide guidance on concrete encasement and vehicle applications. Use the product’s instructions for final dimensions and curing time.
Test water flow before the concrete cures or pavement is restored
Flush the channel with clean water before the concrete cures or the driveway surface is replaced. Start with a modest flow and watch whether water moves smoothly through the channel, outlet, and discharge point. Check for leaks at joints, standing water, blocked connections, and water backing up toward the driveway.
Testing at this stage gives you an opportunity to correct elevation, outlet, or connection problems while the installation remains accessible. Remove construction debris, concrete residue, and soil from the grate and channel before the final inspection. NDS recommends testing the system during installation so drainage issues can be addressed before the surrounding surface is finished. Allow the concrete to cure according to the product and concrete instructions before driving over the area.
Avoid Channel Drain Mistakes and Maintain the System
A channel drain works best when every part of the system is planned together, from the grate and channel to the outlet and final discharge point. A drain that looks properly installed can still perform poorly if the channel is undersized, the outlet is restricted, or the surrounding pavement directs water the wrong way.
Driveways also face changing conditions throughout the year. Leaves, mulch, sediment, vehicle traffic, concrete movement, and heavy storms can all affect drainage performance. Regular inspections help you catch small issues before they lead to standing water, pavement damage, soil erosion, or runoff near the foundation.
Use these maintenance and installation checks to keep your driveway drainage system working reliably. The NDS channel drain installation guide recommends removing debris, inspecting the installation, and flushing the system with water as part of routine care.
Size the channel correctly and confirm outlet capacity
Choose a channel drain based on more than the width of your driveway. Start by measuring the surface area that sends water toward the drain. Then consider rainfall intensity, driveway slope, surface material, and the amount of runoff expected during a heavy storm. A large catchment area or steep driveway may require a deeper channel, a wider grate, additional outlets, or multiple drain runs.
The outlet must also carry water away from the channel quickly enough. A wide grate will not solve a drainage problem if the outlet pipe is too small or discharges into an area that cannot handle the flow. Central Pro Supply explains that channel drain sizing typically considers drainage area, rainfall intensity, and runoff coefficient in its guide to channel drain sizing.
Review the capacity of the entire system, not just the channel itself. If you are unsure how much runoff your driveway produces, ask a drainage professional to assess the site before purchasing materials.
Prevent slope, elevation, and discharge-planning errors
A channel drain must sit at the correct elevation to collect water without creating a raised edge that catches tires or creates a trip hazard. The surrounding pavement should direct water toward the grate, while the channel and outlet should carry it to a suitable discharge point.
Poor slope planning can leave water standing inside the channel or direct runoff toward the garage, landscaping, or foundation. Dakota NA notes that a 1% slope requires approximately 1 inch of fall for every 8 feet, although the proper grade depends on the product and site conditions. Review the manufacturer’s channel drain installation guidance before excavating or cutting concrete.
Plan the discharge location before installation begins. Never send concentrated runoff toward a neighboring property, unstable soil, retaining wall, or foundation. In some locations, local rules may also apply to stormwater discharge, grading, or connections to existing drainage systems.
Choose the right grate for vehicle traffic
The grate must support the type and weight of traffic that will cross the driveway. A grate designed for foot traffic may crack, bend, or separate under passenger vehicles, delivery trucks, trailers, or work equipment. Check the manufacturer’s load classification and compare it with the actual use of the property.
European load ratings commonly range from A15 for pedestrian areas to B125, C250, and D400 for progressively heavier traffic. The correct rating also depends on proper installation, concrete support, and the condition of the surrounding pavement. A heavy-duty grate may fail if the channel is not fully supported beneath and along its sides.
If the driveway serves a business, rental property, shared parking area, or home with frequent deliveries, account for occasional heavy vehicles. Central Pro Supply explains how to select vehicle-rated grates according to the weight and type of traffic. When comparing products, check the complete system rating rather than choosing a grate separately from the channel body.
Leave enough depth below the grate
A channel drain needs adequate space below the grate for the channel body, bedding material, concrete support, and outlet connections. Installing the grate too close to the surface can make the system unstable, reduce its capacity, or prevent proper connections to the outlet pipe. It can also place excessive stress on the grate when vehicles pass over it.
Many systems require approximately 4 to 6 inches below the grate surface, but the exact depth varies by product and site. Driveway installations often need a concrete base and side encasement to support vehicle loads. NDS recommends a 4-inch concrete base where cars will drive over the channel.
Follow the manufacturer’s specifications for trench depth, base thickness, side support, and concrete strength. Do not use a general measurement as a substitute for the product instructions. Before pouring concrete, confirm that the grate will finish flush with, or slightly below, the surrounding pavement.
Seal joints, end caps, and outlet connections
Poorly connected joints, end caps, or outlets can allow water to escape beneath the driveway before it reaches the intended discharge pipe. Over time, that water may wash out bedding material, create voids, and contribute to pavement cracking or settlement.
Before placing concrete, inspect every connection. Confirm that channel sections are aligned, fully joined, and supported along their length. Use the seals, adhesives, brackets, and connection parts specified by the manufacturer. Installation brackets can help keep channel sections level and prevent movement while concrete is poured, as noted in Vodaland USA’s guidance for trench drain installation.
Protect open channel ends from soil and wet concrete during installation. Support the outlet connection so it does not shift while the trench is backfilled. After the system is assembled, run water through it before the concrete cures. This makes it easier to identify leaks, misaligned sections, or a blocked outlet while corrections are still practical.
Remove leaves, mulch, and sediment from the grate and channel
Channel drains commonly collect leaves, grass clippings, mulch, gravel, and soil carried by driveway runoff. When debris covers the grate, water may flow around the drain instead of entering it. Sediment inside the channel can also reduce capacity and block the outlet.
Inspect the grate regularly, particularly when nearby trees are shedding leaves or landscaping work has disturbed the soil. Remove the grate according to the manufacturer’s instructions, then scoop out debris from the channel. Use a soft brush or plastic tool when needed, and avoid striking plastic or coated surfaces with metal tools.
NDS recommends periodically removing grates and clearing debris before flushing the channel with water. While cleaning, check that the grate sits securely and that fasteners are not missing. If the channel fills with sediment soon after cleaning, look for exposed soil, a failing landscape edge, or a drainage pattern that sends too much material toward the grate.
Flush outlets and inspect the system after heavy storms
Flushing the channel with clean water helps move fine sediment toward the outlet and shows whether water is leaving the system as intended. After removing visible debris, run a garden hose through the channel and watch the discharge point. Slow flow, sudden backup, or pooling may indicate a blocked outlet pipe or downstream problem.
Inspect the system after intense storms because heavy runoff can carry more soil and landscape debris into the drain. Check whether water reached the grate, overflowed onto the driveway, or caused erosion around the outlet. Look for displaced soil, new sediment deposits, and water collecting near the garage or foundation.
If the system backs up repeatedly, cleaning alone may not fix the problem. The channel may be undersized, the outlet may lack capacity, or the discharge point may be blocked. A professional assessment can identify whether the system needs a deeper cleaning, additional drainage, or changes to the outlet and grading.
Check grates, joints, concrete, and surrounding pavement for damage
During routine maintenance, look for cracked or loose grates, separated channel sections, damaged end caps, and standing water inside the system. Inspect the concrete around the drain as well. Cracks, gaps, and settlement may allow water to enter beneath the pavement and weaken the base.
Check the surrounding driveway for sinking, raised edges, widening cracks, or soil erosion. These signs can indicate that the drain has shifted or that water is escaping below the surface. A loose grate can also create a noise or safety issue when vehicles pass over it.
Replace damaged parts with compatible components rather than covering the problem with sealant or a new layer of concrete. If the drain is near a garage, foundation, retaining wall, or landscaped slope, have the broader drainage system inspected. TX Gutter Solutions provides drainage services that can help identify connections between driveway runoff, downspouts, grading, and foundation protection.
Protect grates during nearby concrete or landscaping work
Concrete, soil, mulch, and construction dust can quickly clog a new or recently cleaned channel drain. Cover the grate during nearby work, but make sure the covering does not trap water inside the channel. Keep wet concrete away from grate openings, joints, outlets, and removable access points.
Do not drive over the drain until the surrounding concrete has cured and the installation instructions allow traffic. Dakota NA advises waiting 72 hours before placing weight on the concrete or moving drainage channel grates, although curing time can vary based on weather and the concrete product.
After landscaping or paving work, remove the protective covering and clear away any residue. Check the grate, joints, and outlet for debris, then test the system with water before returning the driveway to regular use. These simple precautions help prevent avoidable clogs, stains, alignment problems, and damage to the channel system.
Choose TX Gutter Solutions for Driveway Drainage
A channel drain can help collect water crossing a driveway, but it should not be treated as a stand-alone fix. Its location, size, outlet, and discharge point must work with the property’s gutters, downspouts, grading, landscaping, and foundation protection plan. Otherwise, water may continue pooling near the garage, washing out soil, or flowing toward the foundation.
TX Gutter Solutions takes a broader approach to exterior water management. The team can evaluate where runoff originates, how it travels across the property, and which improvements may help direct it safely away from structures and landscaped areas. This may include channel-drain planning, downspout adjustments, gutter repairs, drainage solutions, and ongoing maintenance. Explore the company’s complete range of gutter and exterior protection services to see how related drainage concerns can be addressed together.
A professional assessment also helps identify issues that may not be obvious from the driveway alone. For example, a clogged gutter, damaged downspout, or low area in the yard may be contributing to the pooling. Addressing the source can improve the results of any driveway drainage work.
Assess gutters, downspouts, grading, and channel-drain placement together
Water collecting on a driveway can come from several sources. Roof runoff may spill from a clogged, damaged, or undersized gutter. A downspout may release water too close to the driveway or foundation. Poor grading can also send surface runoff toward the garage rather than away from the structure.
A channel drain can collect water at a low point, but only when it is placed and sized correctly. TX Gutter Solutions can review the driveway alongside the surrounding gutters, downspouts, grading, and drainage paths. This helps create a more complete plan instead of treating one visible puddle without addressing its source.
Proper terrain assessment and trench preparation are important parts of channel-drain planning. Dakota’s channel-drain installation guide explains why trench dimensions and site conditions affect system performance.
Create a drainage plan that protects foundations and landscaping
A useful drainage plan should answer three basic questions: Where is the water coming from, where does it collect, and where can it go safely? Depending on the property, the solution may include a channel drain across the driveway, extended downspouts, a better discharge point, or grading changes that direct water away from the foundation.
Landscaping should be part of the plan, too. Uncontrolled runoff can wash away soil, expose roots, damage planting beds, and leave muddy areas along walkways or driveways. A discharge point that protects the foundation but damages a flower bed is not a complete solution.
TX Gutter Solutions can evaluate the property’s layout, surface materials, and runoff patterns before recommending improvements. Professional input can be especially helpful when the work involves concrete, excavation, underground connections, or several sources of runoff. As MyBuilder notes, professional installation can help reduce errors and avoid future repair costs.
Coordinate drainage with seamless gutters, repairs, cleaning, and leaf protection
A new channel drain may not perform well if the gutter system contributing to the runoff is leaking, clogged, or missing a suitable downspout route. Coordinating driveway drainage with the rest of the property’s water-management system can produce a more reliable result. Seamless gutters collect roof runoff, while properly positioned downspouts help carry that water toward a safe discharge area.
Maintenance matters after installation, as well. Leaves, mulch, and sediment can block gutters, downspouts, and channel-drain grates, limiting water flow during heavy storms. TX Gutter Solutions provides gutter installation, repairs, cleaning, and leaf protection to help keep connected drainage components working together.
Channel drains also need periodic care. Removing the grate, clearing debris, and flushing the channel and outlet can help prevent buildup. NDS Systems recommends routine channel-drain cleaning to support proper drainage performance.
Get professional installation, maintenance, and transparent estimates
Driveway drainage installation involves more than placing a grate in a trench. The channel must be set at the correct elevation, supported with the right base, connected to a functional outlet, and protected from vehicle loads. Concrete cutting, excavation, grading, utility checks, and pavement restoration may also affect the work.
A small error can leave the channel too high, too low, or poorly aligned with the driveway. It may also cause standing water, shifting components, leaking joints, or damage around the concrete. Professional installation helps ensure the system is planned for the property rather than fitted as a temporary patch.
TX Gutter Solutions offers professional evaluations and transparent estimates before work begins. The team can explain the recommended scope, discuss related gutter or downspout improvements, and identify maintenance needs. Contact TX Gutter Solutions to request an estimate and discuss the drainage concerns affecting your property.
Serve homeowners and property owners across Austin, San Antonio, Dallas–Fort Worth, and surrounding communities
Drainage conditions vary throughout Central Texas. One property may have compacted soil and a steep driveway, while another may have mature landscaping, an older gutter system, or a garage threshold that sits at a low point. Local weather and property layout also affect how much runoff a system must manage.
TX Gutter Solutions serves homeowners, businesses, and property owners across Austin, San Antonio, Dallas–Fort Worth, and surrounding communities. Service areas include communities such as Cedar Park, Leander, Round Rock, Georgetown, Bexar County, Dallas, Fort Worth, Plano, Frisco, Arlington, and McKinney.
The family-owned, veteran-led team focuses on practical recommendations and durable exterior protection systems. Whether you need help with driveway drainage, seamless gutters, downspout routing, gutter cleaning, leaf protection, repairs, or maintenance, TX Gutter Solutions can evaluate the property and recommend work suited to its drainage conditions.
Frequently Asked Questions
Can a channel drain prevent water from entering my garage?
It can help when runoff travels across the driveway toward the garage threshold. The drain must be placed at the correct elevation, sized for the water volume, and connected to an outlet that carries water away safely. If the garage still receives water, grading, gutters, downspouts, or the discharge route may also need attention.
How do I know what size channel drain my driveway needs?
The size depends on the paved area draining toward it, driveway slope, local storm intensity, debris exposure, and outlet capacity. Include runoff from nearby roofs, patios, sidewalks, and downspouts when evaluating the system. A drainage professional can review the entire catchment area and recommend the appropriate channel and pipe sizes.
What type of grate is best for a residential driveway?
Choose a grate rated for the vehicles that will cross it, not just for the appearance or price. Many residential driveways use light vehicle-rated options, while properties with delivery trucks, trailers, or frequent turning may need a stronger classification. The surrounding concrete support and trench base also affect performance.
How often should a driveway channel drain be cleaned?
Inspect it several times a year and after heavy storms, especially if trees or landscaped beds are nearby. Remove leaves, mulch, gravel, and sediment from the grate and channel, then flush the outlet with clean water. Frequent buildup may indicate that the surrounding landscape or drainage design needs additional attention.
Should I install a channel drain myself or hire a professional?
A small installation on an accessible, unpaved surface may suit an experienced homeowner. Professional installation is a better choice when the project involves cutting concrete, locating utilities, changing grading, connecting downspouts, or directing water near the foundation. TX Gutter Solutions can assess the driveway and related drainage components before providing an estimate.